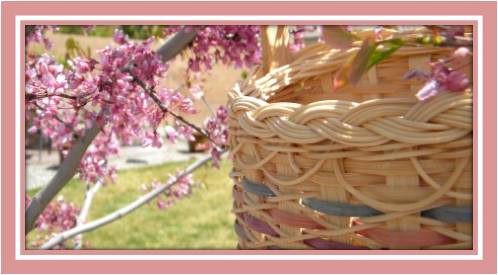


Mini Muffin Basket
With Solid Bottom Base
Pattern Written by Nancy Jacobs ©2009
Finished Size 7 1/2”l x 4 1/4”w x 2 3/4” high
Materials Required
• 5/8” flat reed
• 3/8” flat reed
• 1/4” flat or flat/oval reed (I used dyed reed for this)
• #3 round reed
Directions
1. Cut stakes from 5/8” flat reed 7 pieces 14” long.
2. Cut stakes from 5/8” flat reed 4 pieces 18” long.
3. Cut fillers from 3/8” flat reed 3 pieces 15” long.
4. Lay out horizontally the 4 pieces 18” stakes rough side up.
5. Lay out horizontally the 3 filler pieces from 3/8” flat smooth side up.
6. Begin weaving with the center stake, a vertical 5/8” piece that is 14” long. With this center piece weave over the filler stakes and under the 5/8” pieces. These vertical pieces are also rough side up.
7. Weave in the remaining 6 vertical pieces that are 14” long. Three pieces woven on each side of the center stake. All weaving is a basic over/under weave.
8. Even up the base so that it measures close to 7 ½” x 4 ¼”.
9. Turn the basket upside down, smooth side up, and fold back the fillers cutting and tucking them in. Turn the basket over again so you are now back to rough side up.
10. Twine one row with #2 or #3 round reed to hold the shape of the base.
11. Upset the stakes.
12. Weave rows 1, 2, and 3 using 3/8” flat reed. Again, all weaving is basic over/under.
13. Weave row 4 with ¼” flat or flat/oval reed
14. Row 5 is 3/8” flat reed
15. Row 6 is ¼” flat or flat/oval reed
16. Twine around the basket with #2 or #3 round reed for 2 rows.
17. Tuck in all stakes.
Making the Rim
1. Cut 22 pieces of #2 or #3 round reed 22” long. The round reed is called “spokes”.
2. Insert one end of each piece of round reed up through the twining on each stake stake. Now take the other end of each piece of round reed, skip one stake to the right and insert it up through the twining 2 stakes to the right of the first end. Pull the ends up evenly to form a scallop. Do the same with each piece of round reed. Try to make your scallops the same size. All the loose ends of the round reed should be pointing upward and should be even. Each stake should have 2 ends of round reed coming up from the twining. The two ends of the round reed are now worked together as one and are called a “pair of spokes”.
3. First step. Take any pair of spokes and go behind the pair to the right and out to the front of the basket. Repeat this step around the basket. You will have one set remaining. Push the beginning set up slightly and take the last pair behind the beginning pair and out to the front. Snug the first row of the braid to the basket, making sure that the round reeds are not twisted.
4. Second step. Take any pair of spokes and go over the set of spokes to the right and to the inside of the basket. Again snug this row and make sure the round reed is not twisted.
5. Third step. This is exactly the same as the First Step.
6. Fourth step. This is exactly the same as the Second Step. It is the third and fourth steps that give a double braid appearance.
7. Let the basket dry and then trim the ends. This will prevent one of the ends from accidentally getting cut too short and popping out.
To make a bow, cut a 12” piece of ¼” reed and begin by inserting under the center stake horizontally. Center up the ends. Loop the ends over and insert down under the next row of weaving. Trim to desired length.
This has always been one of my favorite baskets to weave. It is the perfect size for 6 mini muffins or 2 coffee cups with a small package of gourmet coffee. It makes a beautiful gift.
Also, be sure to visit my blog at www.basketmasterweavings.blogspot.com or my website at www.basketmasterweavings.com I’d love to see a picture of your finished basket!
Enjoy.... Nancy

6 comments:
that little basket is so cute!
Where the muffins at in you basket? Girl you got my appetite all worked up and left me hanging!
Very cute!!
Oh. My. Gosh! Learning how to weave a braided rim was awesome! This is my second favorite project I've woven with you, Nancy, and the one I'll weave most often, for now. (I think it will trump the ribbon basket this season.) My favorite is still the local "Easter Basket" class project from last year...
As soon as I stain my "Mini Muffin Basket", I'll post a link to my pictures.
Thank you again for posting this pattern and technique for the braided rim. You are amazing!
Hugs and blessings~
~~~Anne
How do you prepare your reeds? do you only soak them i n water with nothing added? For how long?
Could you show how to create a basket made out of the seagrass or rope type materials, I really love the way those baskets look.
Your baskets are so lovely.BTW You do such a great job. Wonderful that you teach us all, Thank you.
very cute basket...well done
Post a Comment