May Your Life Be Like A Basket...Useful...Bountiful...Beautiful...

Basketmaster's Weavings is about my passions, much of which revolves around basket weaving. I weave with reed and I love teaching others to weave. Many of the patterns and styles that I show in the blog are geared to the beginning weaver, or even the brand new weaver. If you have been thinking about wanting to learn to weave, then this blog is for you. Throughout the blog and videos I take you step by step through each and every process of weaving. I want you to be successful in weaving the very first time you try. For the intermediate and advanced weaver, my wish is that you take ideas that I show, mix them up a bit, and incorporate them into your own beautiful creations.

Happy Weaving and Baskets of Blessings to all my visitors,

Nancy

You may find my YouTube Videos Here.

Listen to Basketmaster's Making our Home a Haven Podcast.


Tuesday, June 29, 2010

Book Review - Rib Baskets

Good Afternoon Friends,
I was asked some questions about my egg basket that I mentioned HERE and if I had a pattern for it.  I'm sorry to say but I have not put a pattern for ribbed baskets here on the blog.  I've only woven about a dozen of them and they just are not my favorite.  Sorry, I know some of you love weaving them and you do such beautiful work.

I have a book that I use called Rib Baskets by Jean Turner Finley.  It is soft cover, 80 pages and published in 1987.  It discusses materials, general directions for all rib baskets, decorative options and the following basket variations:  Melon Basket, 8" Roll Basket, Scottish Yarn Basket, Potato Basket, 8", 10" and 12" Egg Baskets, 7" and 10" Key Baskets, Herb Basket, Hen Basket, Oriole Basket, Market Basket, Rounded Market Basket, Classic Appalachian Basket, Wreath, Shelf and Doll Cradle.

Even though it is an older book it has MANY photos and illustrations that clearly explain how to weave a ribbed basket.  Once you learn the basic steps with regards to the hoops, ears, ribs and weavers then you can step out in your weaving by changing the shape to create the baskets mentioned above.

Many public libraries have some basic basket weaving books that often contain instructions for making ribbed baskets.  Rib Baskets by Jean Turner Finley just happens to be on my bookshelf and if you are looking to purchase one, I think this book is very thorough and complete in explaining ribbed basketry.
Happy Weaving,
Nancy

Sunday, June 27, 2010

Sloped Gathering Basket


This little basket uses a 4 x 6 D handle.  I use it to hold packages of seed for my garden.  To create the slope up each side, you simply do not weave all the way around the basket.  You only weave from the left and stop at the right.  Each time you do that you move in one stake.  For the rim row at the top which is hidden, I twined with round reed for 2 rows and then lashed the rim onto the twining.
Have a Blessed Sunday,
Nancy

Wednesday, June 23, 2010

Back to Basics in Basket Weaving - How To Dye Reed


Today I would like to post my directions on how I dye my reed. There are several dyes on the market, but I use good old Rit dye and this is my recipe.

I use a large enamel pot and work outside on an outdoor propane burner. I fill the pot about 1/2 full of water which in my case is about 2 1/2 gallons of water. I get the water up to a boil and add one box of powdered Rit die, 1 cup table salt and 1 cup white vinegar. I use powdered Rit only because it cost less than the liquid, but liquid is fine. I use the salt and vinegar to help get the color to really set well. Yes, it will fade if placed in direct sunlight, most dyes will but the salt and vinegar just seem to help keep it from having any natural fading. Using my recipe gives me really rich colors. Once the water is boiling, I turn off the heat and add my reed. I will add 2 1/2 pounds of reed to this mixture. Any more than that, it just doesn't get the intensity of color that I like. Usually I will dye 1 pound of 3/8" flat and 1 pound of 1/4" flat. Then I use 1/2 pound of another size of my choice. This just seems to be what works for me. I open up my pounds of reed and submerge them into the pot of dye doing one pound at a time. I have a big set of barbecue tongs to help push the reed down into the water. Sometimes it wants to float and most times I have to turn it to be sure it gets complete coverage. I have plenty of newspaper on the ground to catch drips and to also lay the reed on to dry once it has achieved it's color. Getting the color usually only takes a few minutes, but I have been known to let the reed soak for up to an hour. Dying reed is a simple process and very fun to watch the colors appear. I don't wear gloves, but I do wear old clothes. Please don't dye it in your kitchen. Accidents can happen too easy and oh what a mess! Also, be sure to visit http://www.ritdye.com/ for color charts, techniques and ideas.
Have Fun!
Nancy

Sunday, June 20, 2010

Share a Basket Sunday - Ribbed Egg Basket

This egg basket uses embroidery hoops for the frame. Try to remove the metal or plastic tightening mechanism. If that is not possible, try to flatten the mechanism out and hide it behind the God's eye.
Happy Weaving,
Nancy

Thursday, June 17, 2010

Back To Basics in Basket Weaving - Spoke Weight


I have a couple of favorite basket weaving tools, but today I'm going to talk about my #1 tool, the Spoke Weight.

When I first learned how to weave we would put our dishpans full of water on the table to hold our reed in place. While this worked, it was very space consuming. The spoke weight is a heavy metal weight that also is a ruler. It is perfect for holding reed in place and measuring to get the exact length of reed or space between reeds. This is a must have tool for basket weavers.

Here is my tip. What if you don't have a spoke weight and don't want to put the dishpan on the table? What if you do have a spoke weight yet your basket is large and you need more than one. Here's what you do. Go to your pantry and get out a bag of dried beans and use that as a weight. Dried beans are inexpensive, the plastic bag keeps the beans dry, and they don't take up hardly any additional table space. Use 2, 3, or 4 bags if needed. It is a handy homemade kitchen tool to make your basket weaving just that much easier!
Happy Weaving,
Nancy

Saturday, June 12, 2010

Around the House Saturday - A Basket A Birthday An Anniversary and A Podcast

Hi Friends,
The past week and a half has been a busy one.  I'm sure it has been busy for most of you as well.
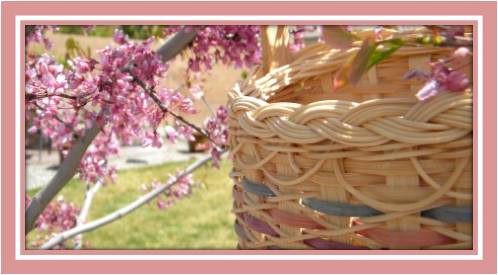
The basket I'm sharing is one I wove years ago and has traveled with us on all our moves.  I think every house we've lived in has had stairs so this stair step basket has been wonderful and so useful.  What I like about this basket is that the wooden D handle goes clear down to the bottom step or the bottom of the basket.  Some patterns you see will use a smaller D handle that only reaches the first step.  I think with it going to the bottom step it gives it more stability to carry heavier items.

The cross stitch design is the same one I showed you in my Hamburger Bun Basket found HERE.
You can see with all the use this basket has received some of the little "X"s have broken.  Someday I should take them all out and replace them.   The handle is braided and gives it another decorative element.

Onto a Birthday...Emily turned 15.  She has been visiting Grandma and Grandpa this week and is now back home.  She is doing babysitting several times a week and ice skating whenever she gets a chance.  I want to add one more thing.  We took her back to the fibromyalgia specialist.  Once again they changed her medication and she is doing so much better.  Praise God!  Grandma even said she did real good this past week.  Emily was feeling so discouraged a month ago so we are all very happy at this time.

Now for our Anniversary...Mike and I celebrated 22 years.  We were actually apart for our anniversary as he had taken the Venture scouts to San Diego for their summer trip.  We will be going out for a nice dinner sometime this week for our anniversary dinner.  After 22 years, it doesn't matter if we don't celebrate on the actual day ;-)

Finally a podcast...I have episode #9 of Making Our Home a Haven available to listen to.  You can listen to it on the audio player here on my sidebar or you can go to iTunes and subscribe and listen to it from there or download it onto your iPod or MP3 player.  Or if you prefer you can go directly to Talkshoe and listen to it HERE.  The topic in this episode is "Loving Up Your Home."  I give tips on using your 5 senses to refresh and love up the home we live in.

I've had a few questions about the podcast that I'd like to answer.  I use Audacity as my audio mixer.  It is a free download.  I have the bird sounds on one track that I have saved and I record my voice on another track.  It does quite a number of things, but it is simple enough for me to mix just the two tracks.  One episode I had a tickle in my throat and started coughing.  I was able to cut the coughs right out.  You can also increase or decrease the volume of just one track.  Other than these little basics, I don't know much more, but I know Audacity does a lot more.

I use Talkshoe as it is a free hosting service.  Another free service is Blog Talk Radio.  I don't know why I went with Talkshoe.  I just checked into it and it was easy.  I'm all about easy when it comes to the computer.  Talkshoe automatically uploads it into iTunes for me.

The microphone I use is just the one that is built into my laptop.  I've had to buy nothing extra to do the podcast.  Starting at the third or fourth episode I began recording in our closet.  I know that sounds funny, but when I have seen recording studios, they have wavy fabric walls to keep the sound from echoing.  I figured my closet would do the same thing!  We have a walk in closet.  I sit in on a chair in there and face the clothing.  I close the door behind me and make sure the air conditioner is turned off so that it won't start running while I'm recording.  I kind of feel like a little kid in trouble who has to sit in the corner as I record!

As far as using a script.  The first 2 episodes I wrote everything out word for word.  Now I just have an outline that I follow.  My first episode I must have started and restared it a dozen times.  Now I still have to restart the recordings at least once, but it is much better.  Sometimes I just get tongue tied or my thoughts escape me, telling me I need more on my outline.  I just erase my mistakes and start over.  It actually goes pretty quickly and I think making the podcasts is way faster than doing my YouTube videos.

So, I hope that answers everyone's questions.  Have a great week everyone.
Blessings,
Nancy

Thursday, June 10, 2010

Back to Basics in Basket Weaving - Making Reed Curls


I've had people ask, "How did you make those curls?" "Are those curlie Q's made from reed?"


Yes, those curls are made from reed. I used 11/64" flat reed and rolled it around a 1/4" dowel rod. Soak the read well first, 15 minutes at least. Then secure the end of the reed to the dowel with a clothespin and just keep wrapping. Secure the other end with a clothespin as well. Let the reed dry completely before removing it from the dowel. You can then pull on the coils slightly to give them a springy look. You can do the same thing using round reed as well for a pretty look. Once the reed is removed from the dowel rod, cut it into desired lengths and wire to your basket. Try using several colors or a color with natural for a pretty basket embellishment.
Happy Basket Weaving,

Nancy

Tuesday, June 8, 2010

A Fantastic Basket for a Gift

Dear Friends,
I just think this is the greatest idea for a gift.  A sweet friend of mine, who has asked when I post that she'd like to remain anonymous, made 11 of these for teacher gifts.  These are baskets that she has woven and on the wooden bases are her children's names, in their own handwriting, that have been laser engraved.  Wouldn't a teacher or relative just treasure this!!!  Cute Cute CUTE!!! 
I've never worked with a wood burning tool, but I wonder if you couldn't do something similar with your child's handwritten name.
I just love this idea and honestly, I wish I'd have thought of it when my children were younger.
Thank you dear friend for letting me share this.
Happy Weaving,
Nancy

Sunday, June 6, 2010

Share a Basket Sunday - Rose Bowl

Good Morning Friends,
The basket I want to share with you is one I wove years ago at a convention workshop.  The title is called "Rose Bowl" and the author is Linda Lugenbill.  This basket is about the size of a large fruit bowl and I just love it.  It's home is in my craft room with me and hold some of my supplies as I work.
Hope you are all having a blessed Sunday.
Happy Weaving,
Nancy

Tuesday, June 1, 2010

Back to Basics in Basket Weaving -- Creating A Professional Finish

Before cutting and tucking your spokes, fold down the spokes that are to go to the inside of the basket. Measure those spokes so that when you cut them, the end will be hidden behind one of your weavers. The goal is not to have any rough ends showing to give you a professional look. This way, when someone is looking at your basket, they do not know where pieces of reed have started and where they have ended.When tucking your spokes in, try to go under the very top weaver. Again, this gives a more professional look to your basket. Take a look at the finished product. You don't see the spoke hidden behind the weaver. I always say, this is a big difference between our beautiful handwoven baskets and those that we purchase at the store.
Happy Weaving,

Nancy

Grab a cup of coffee and take time to enjoy some posts from the past

Affiliate Disclosure Statement

Some of the links/codes on this blog are affiliate links, which means if you chose to make a purchase using my links, I will earn a commission. This commission comes at no additional cost to you. I recommend these products because I have found them to be helpful and useful, not because of the small commissions I make. Every product I recommend, I use myself.