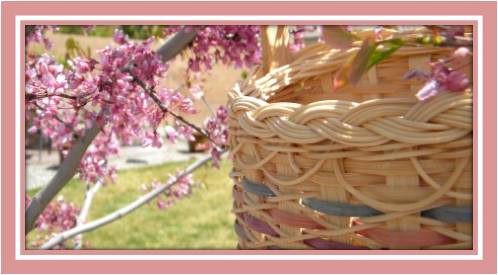
Happy Mother's Day to all my mommy readers. I hope you are all being spoiled today. I have no idea what is in store for me but I'll be sure to let you know.
I haven't shared a free basket pattern with you in some time and so I thought today would be fitting.
Have a beautiful and blessed Sunday,
Nancy
Elegant Mother’s Day BasketPattern Written by Nancy Jacobs

Finished Size: 9” x 4 1/2” not including handle height.
Materials Required:
5/8” flat reed
1/2” flat reed - spokes
3/8” flat reed
3/8” flat/oval reed
11/64” flat or flat/oval reed
1/4” flat or flat/oval colored reed
#2 or #3 round reed
Seagrass
3 yards wire edged ribbon
6” thin wire (i.e. 22 gauge)
Floral embellishment
Procedure:
1. From 1/2” flat reed cut 11 pieces 23” long and 1 piece 63” long.
2. Mark the centers of these pieces on the rough side with a pencil
3. Lay out the 63” piece and 5 of the 23” pieces, rough side up, matching the centers, and to look like the spokes on a bicycle wheel. These become the spokes of the basket.
4. Take 2 long pieces of #2 or #3 round reed and begin twining around the spokes. Continue twining tightly around the base until it measures 6 inches in diameter.
5. Lay out remaining 6 pieces of 1/2” flat reed in the spaces between the woven spokes, rough side up, matching center pencil marks.
6. Continue twining, incorporating these new spokes. Twine until the base size reaches 9”.
7. Upset the spokes and twine for 2 more rows. The rough side of the reed is on the inside of the basket.
8. Using a basic over/under weave, weave the following:
Rows 1 and 2 - 3/8” flat
Row 3 - 1/4” flat or flat oval colored
Rows 4 and 5 - 3/8” flat
Row 6 - 5/8” flat
Rows 7 and 8 - 3/8” flat
Row 9 - 1/4” flat or flat/oval colored
Row 10 - 3/8” flat
Row 11 – 1/4” flat or flat/oval
9. Cut off the spokes that are on the inside of the basket flush with the top row of weaving. DO NOT CUT OFF THE HANDLES EVEN IF THEY ARE ON THE INSIDE OF THE BASKET.
10. Loop over the 63” reed to the opposite side of the basket and insert each side into the weaving creating the desired height to create the handle.
11. Cut and tuck in remaining spokes to the inside of the basket.
12. Place a piece of 3/8” flat/oval reed on the inside and outside of the top row of weaving.
13. Insert seagrass between the two pieces of 3/8” flat/oval reed. This will hide where the spokes were cut and tucked.
14. Lash on rim with 11/64” flat or flat/oval reed.
15. Wrap handle with 11/64” flat or flat/oval reed. Insert a strip of 1/4” colored reed along the center of the handle. Allow the color to show through by occasionally wrapping the 11/64” both under and over the colored reed.
16. If desired, stain basket at this time. When basket is dry, remove row #6 by cutting out the piece of 5/8” flat reed.
17. 17. Replace row #6 with wire ribbon. Center ribbon on the back of the basket and weave over/under to the front. Make a bow and wire in place. Embellish with flowers if desired.
18. Enjoy your basket!!!
This Post Links To these Fun Blogs:
Under The Table and Dreaming
Make It From Scratch
Somewhat Simple
Along for the Ride
Tatertots and Jello


5 comments:
What a lovely basket. I've always wanted to learn to make baskets....maybe someday :)
Blessings!
Gail
such talent you have! I've poked around your blog and think it is great. I've become a follower.
What a gorgeous basket. You amaze me each and every week with your talent. Thanks for stopping by and joining the Sunday Showcase! I greatly appreciate it. Hope you have a wonderful week! ~ Stephanie Lynn
Oh my gosh...what a great tutorial. I am inspired to make a basket...I never have and would love to learn.
Holly
504 Main
Very pretty!
Post a Comment