May Your Life Be Like A Basket...Useful...Bountiful...Beautiful...

Basketmaster's Weavings is about my passions, much of which revolves around basket weaving. I weave with reed and I love teaching others to weave. Many of the patterns and styles that I show in the blog are geared to the beginning weaver, or even the brand new weaver. If you have been thinking about wanting to learn to weave, then this blog is for you. Throughout the blog and videos I take you step by step through each and every process of weaving. I want you to be successful in weaving the very first time you try. For the intermediate and advanced weaver, my wish is that you take ideas that I show, mix them up a bit, and incorporate them into your own beautiful creations.

Happy Weaving and Baskets of Blessings to all my visitors,

Nancy

You may find my YouTube Videos Here.

Listen to Basketmaster's Making our Home a Haven Podcast.


Saturday, October 31, 2009

Happy Halloween - A Witch Basket - and Instant Messaging

I made this witch basket years ago at a basket guild meeting. I wish I had a better photo of it but I have given this basket away. The rim is interesting as it is a "rolled border". I sewed the arms and the hat came from the doll department at a craft store.  It is not my design.  This pattern is titled "Hagetha" and the author is Wanda Grahm.

I also wanted to say, last night on my computer, a small window popped up with the first name of someone asking if they wanted to be my friend for IM'ing.  I'm not into instant messaging so I declined, but then the computer said it would block all messages from this person.  I didn't want to block e-mails from this person, I just didn't want to become involved with IM.  I didn't recognize this person immediately.  Then thought it might be a blog reader.  I don't want to offend anyone here and I'm sorry if it was one of you I blocked.  Blocking was not my intent.  It just seemed to happen when I declined receiving that person's IM's.
Hope you all understand.
Happy Halloween,
Nancy

Friday, October 30, 2009

Lidded Yarn Basket


Did you hear the news?  Julie has her patterns now for sale over at Basketpatterns.com.  Here is the yarn basket I wove from her pattern as I tested it.  I think it turned out beautiful!  The lid is interesting as it has a hole in the center of it for the yarn to come out.  Very clever.  It is plenty wide around to hold a large skein of yarn upright inside it.  A bit of warning to you new weavers, this is an intermediate pattern so get a few baskets under your belt and then give this fun one a try. 
I've been about to bust wanting to show you these baskets and have been waiting patiently for them to officially go on sale before showing the pictures.
I tested a couple other patterns out for Julie and I will be showing those to you very soon.
Happy Weaving!
Nancy

Thursday, October 29, 2009

Mini Muffin Basket - Tucking in the fillers and finishing the base

Hi Friends,

In this video we will finish the base. That will include tucking in the fillers, twining a keeper row and upsetting the stakes.

Happy Weaving,

Nancy

Tuesday, October 27, 2009

Tulip One-Step Tie-Dye Product Review and an Offer for You


Are you ready to see how I created this?


I did it with this!
And with it, I made these!


Dear Friends,
Remember how I was featured over at FaveCrafts? (See post HERE if you forgot) Well for being part of the FaveCraft family, they sent me a product to test and review. It is the Tulip One-Step Tie-Dye kit.

Now, do you really think I could dye just fabric with it? I feel I would be quite amiss to dye anything other than reed. (If I were reading YOUR blogs, I'd want to know how it preformed on reed.)

So the experimentation on reed begins.
The kit comes with 12 delicious colors. That's great, because my box of mason jars comes 12 to a box as well. That means one color per jar and I won't have to wash out and re-use the jars for additional colors.

I mixed up the first color according to the directions, color plus 4 oz of water (1/2 cup). I dipped the end of some reed in it and it took the color instantly. The directions said that the color could be lightened by adding more water. I decided to go to one cup of water. The reed still took the color almost instantly and with the same intensity as the first dip test. I decided to stick with one cup of water for each package of color.
Into each jar I put the dye, 1 cup water and 1 1/2 oz to 2 oz of reed. (I weighed it just to be sure.) Then I shook up each jar and placed it on its side to help the reed get maximum coverage in the dye bath. I let the reed stay in the dye bath about 1 hour and would turn and shake the jars about every 10 minutes.

Just look how pretty the colors turned out!


Did I tell you I did all this outside on my back patio wearing old clothes? Nancy's Tip: Even under optimum conditions NEVER, I repeat NEVER dye read in the house, or while wearing nice clothing on. The kit comes with rubber gloves as well as a plastic tarp. I used those too while working outside. I do think dying fabric could be less messy because it wouldn't flip and fling little droplets of dye the way reed can.


When the kit came, the colors on the package just shouted, "It's party time!" to me. That said, I decided to design and weave little party baskets to hold candy or small favors.


How about a black and orange basket for Halloween!


One more thing...FaveCrafts has asked me to be a regular guest blogger and contributor on their site. I will be posting monthly as well as offering weaving patterns over there. The first pattern will be these sweet party favor baskets. I'll let you know when the pattern is available.


Oh and still one more thing...FaveCrafts is offering a free eBook from Tulip. You can download it HERE.

And because you are wonderful readers of mine, should you like to purchase the kit, you may go to ILoveToCreate.com and enter the code "fave1009" for free shipping at the checkout.  Please note that this offer expires 11/30/09.

For those of you who have been too timid to try dying your own reed, this is a good way to try dying just a small bit at a time. It really was just one-step.

Happy Weaving,

Nancy

Monday, October 26, 2009

Basket Weaving Video - Mini Muffin Basket - Weaving a Solid Base


In today's video I show how to weave a solid base using fillers.
Happy Weaving,
Nancy

Saturday, October 24, 2009

Market Basket with Swing Handle and Yesterday's Class


This basket is really quite large. The weavers are 1/2" flat reed. It is my own design created around a swing handle. The side embellishment is a swag I found at Hobby Lobby. I must confess with this basket...I found a cheep stain. It sounded liquidy (is that a word?) in the can. Oh such a mistake. It ended up creating a very sticky basket. As always, when will I listen to my own words to stick with Minwax stain in the yellow can. (I'm not knocking the stains specifically created for baskets or the natural homemade stains. Minwax is just convenient for me to purchase and easy to work with.)
One more tip. If you are designing a basket around a swing handle, it really looks nice if you plan for the basket to go up as close to the hinge on the handle as possible without affecting the swing of it.


Here are some pictures taken from my class yesterday.  There ended up being seven sweet ladies who came to class.  Three of them had just finished their baskets and I wanted to get a photo before they left.  I thought we all had a nice time and everyone's basket turned out wonderful.  It was a fun afternoon.
The bottom photo shows a big poster that the library had made advertising the class.  I got two of the posters when I left.  How cool is that?!
Have a blessed Sunday and Happy Weaving,
Nancy

Around the House Saturday

I've been very busy.


This next week I will show you how I did this and what I created with it!

Today is my class at our local library. I'll let you know tomorrow how it goes. I have a full class with 12 students!

On to other things....Emily, our little 14 year old cake decorator has been having some serious shoulder and back pain. It has been a real mystery as to why this pain is occurring. It started back in July when she took a bus trip to church camp. There was no injury that would have caused this pain. Since that time it has been steadily getting worse. We first tried home remedies, then to the doctor for prescription pain medication and muscle relaxants, no results. Then on to physical therapy, the pain continued to get worse with no relief. X-rays have been taken and do not show anything. It is now to the point where she has trouble getting out of bed and even doing her schoolwork. Thank goodness for online homeschooling that she has been doing this past year. She can do an assignment and then rest for a while before doing the next assignment. This next week she will be going in for an MRI. I'm praying this will reveal the cause of her pain and that it will be easily fixed. We will still have to wait for an additional week before we will receive the results of the MRI. Waiting is hard and to see my child in pain is hard for this old mommy. Blogging and creative outlets have helped me keep my mind busy and not continually focused on what she is dealing with. If the MRI fails to show us anything, I don't know where to turn with this. So please keep sending uplifting thoughts and prayers her way. She's feeling very discouraged right now. I hope within a couple of weeks I'll have some good news to report.

Have a wonderful weekend and let me know what creative things you've been up to this week.
Love,
Nancy

Friday, October 23, 2009

Feature a Friend Friday - John from John Toft Basketry


Photos courtesy of John Toft
Dear Friends,

I'd like to introduce you to John Toft, a talented weaver from Canada. His blog is full of photos and information on weaving as well as his home, family and events in the area. In 1998 John retired from teaching and basket weaving became his passion.

John sent me an e-mail showing me the picture of the coffee cup (shown above) that he had woven through inspiration of Julie's pattern and my post HERE. I just think it is wonderful how we can all be inspiring to one another.

He sells his baskets through Etsy and his Etsy shop can be found HERE. It showcases his beautiful woven baskets as well as kits and even greeting cards with woven embellishments.
You really need to visit his shop to see all his wonderful work.

As John has written in his blog, one of his children is autistic. Through his Etsy shop, John gives a percentage of his sales to the Geneva Centre For Autism, Toronto, Ontario, Canada, a world renowned centre for autism research.
Be sure to stop by John's blog, http://johntoftbasketryatetsy.blogspot.com/ and say "Hello" to him and spend some time enjoying his baskets and posts.
Have a wonderful day,
Nancy

Thursday, October 22, 2009

Introduction to Weaving my Mini Muffin Basket


Dear Friends,
We will begin weaving a new basket shortly. It is my "Mini Muffin Basket."
Get you weaving supplies ready. You will need the following:
  • 5/8" flat reed
  • 3/8" flat reed
  • 1/4" flat reed
  • #3 round reed
That's it! Only four sizes needed for this sweet basket.
As always, if you would like to view any of my baskets, you can visit my YouTube channel at
http://www.youtube.com/user/basketmasternancy
Blessings,
Nancy

Wednesday, October 21, 2009

Woven Angel - A Happy Mail Day - Deen Homestead Basketry


What a happy mail day I had on Monday afternoon.  The doorbell rings and it is the UPS man with a package for me!  Inside is this beautiful angel from Julie over at Deen Homestead Basketry.  I've been testing some basket patterns for Julie before they go into publication and she sent me this as a sweet thank you.  It is now my turn to say thank you to her!  The angel is a Christmas ornament, but I think she'll be lovely as my little kitchen angel and I'll keep her on my kitchen windowsill.  (There is no direct sunlight at that window so she'll be fine there.)
Julie has her patterns for sale on her website HERE.  They will be for sale soon at Basketpatterns.com I'll keep you posted when those go live.  The patterns I've tested and woven were the "Recipe Box Basket", the "Yarn Dispenser Basket" and the "Santa Boot".  I'll be posting pictures of those soon.  All three are very unique and clever baskets and were a lot of fun to weave.  Julie is a very thorough pattern writer and there are lots of photos in the pattern making it easy to follow.
Thank you again Julie for both the angel and the opportunity to weave your patterns.
Blessings,
Nancy
ps.  If anyone has patterns they would like tested before publishing, just send me an e-mail.  I promise to give only constructive comments.

Tuesday, October 20, 2009

Tip Technique Tuesday - Starting and Stopping with a Project


I try really hard to complete weaving a basket in just one sitting. Sometimes though, that just isn't possible. I want to give you a few tips on where to stop if you are working on a large project and need to pause so you can cook dinner for the family.


If it is a large project, one stage you can do is read through your pattern, gather your supplies and cut your stakes. Of course you can stop at this point. I like to have all my supplies gathered together because it is frustrating to have to get up and down because I've forgotten something.

Is your basket being woven in all natural reed? If so, and if there are no wooden parts then you can stop at most any time during your project and just resoak it when you are ready to begin again.

If you have wooden parts on your basket such as a wooden base or a wooden handle, you shouldn't even dip those in water. Some wooden handles are held together with glue and the water could affect the stick-um power of the glue. Some handles are steamed into their shape and water could cause them to relax and straighten back out. Of course they may get slightly damp from using wet reed and that cannot be helped, I'm just saying don't dip them in water. So that said, when you start weaving, it is best to weave up to the top of your basket and get your stakes cut and tucked. You can always put the rim on during your next basket weaving session.

If you have used some dyed reed in your project, you should either stop before incorporating the dyed reed on your project, or again weave to the top and do your cutting and tucking. If you need to re-soak your reed later you strongly risk your dyed reed bleeding onto natural reed. Spend a minute really shaping your basket at this point so that when you come back to lash the rim on, your basket will be shaped properly.

If you are doing a braided rim and the basket is in natural, I like to get my round reed in place before pausing.

What happens when.....your child requires that horrible trip to the emergency room when you just have to drop everything? Well, things like this can happen and you have no control of when to stop working at a convenient place. (Seriously though, let's hope that never happens!) What I would do is when I return; I'd mist the reed lightly with a water bottle and work on shaping the basket the best I could. I'd continue weaving up the sides and again mist the reed where it gets cut and tucked. Have a paper towel handy to wipe off excessive drips. By only misting and using a towel to wipe drips you will decrease your chances of the dyed reed bleeding onto the natural reed. When you tuck in your stakes, you may have more cracking and splintering than usual, but...this is just one of those times where that cannot be helped. The cracking and splintering will be hidden by the rim and rim filler.

I hope this gives you some suggestions when to pause your weaving should you need to . Of course, in all instances, it is ideal to go from beginning to the finished project in one session.
Happy Weaving,
Nancy

Sunday, October 18, 2009

Share a Basket Sunday - Halloween Basket with Spindle Handle

I wove this fun little Halloween basket using a 5" spindle handle. I think the handle adds so much and gives it a primitive country look. The embellishments are resin figurines that are just glued to the sides of the basket.
On the inside of the basket you will see the fillers are finished off in a "Crow's feet" or "Chicken feet" method for a fun look.
I think the little raffia bow is the finishing touch!
Baskets of Blessings,
Nancy

Saturday, October 17, 2009

Halloween Candy - Candy Corn Cookie Bark and Candied Apples


The kids and I continue to cook. They love to work in the kitchen and are old enough to do candy making safely. The kids liked the candied apples best but my favorite was the Candy Corn Cookie Bark. (I'm not kidding, the Candy Corn Cookie Bark is seriously yummy!) For the candied apples, I just used the recipe from Joy of Cooking.
Enjoy!
Nancy

Candy Corn Cookie Bark
Recipe adapted from Your Home Based Mom
Ingredients:
One package of Oreos broken but not crushed. Keep in large chunks.
3 cups pretzels, broken into pieces.
2 lb. white chocolate, almond bark
2 cups candy corn
Colored sprinkles

Directions:
Melt almond bark over low heat in a large saucepan.
Add Oreos, pretzels and 1 cup candy corn to the almond bark and mix, coating well.
Cover a large cookie sheet with wax paper.
Pour almond bark mixture onto cookie sheet.
Sprinkle remaining candy corn and colored sprinkles over the almond bark while it is still wet. Tap the sprinkled candy corn lightly into the almond bark mixture but let it stay on the top for decoration.
Place cookie tray into refrigerator until set and firm. Remove and gently break bark into small pieces. Store in air tight container.

Friday, October 16, 2009

Free Basket Weaving Pattern - Tea Cups

Photo courtesy of Deen Homestead Basketry

As the weather is starting to cool and the leaves starting to turn, doesn't a cup of hot tea sound delicious? My favorite flavor used to be Cherry Almond Tea, but it's not being made anymore. Anybody have a good recipe for it?

Well, if I can't have my favorite tea, then at least I can have a favorite teacup. Aren't these adorable. Julie, over at Deen Homestead Basketry has a free pattern on her website for them. You can link to it HERE.

Hope you'll give it a try and be sure to stay warm in your part of the world.

By the way...What is your favorite flavor of tea? I'd like to hear.

Happy Weaving,
Nancy

Thursday, October 15, 2009

Halloween Smores in a Jar

Look what the kids and I made! I actually saw this the first time at Easter with those little marshmallow bunny peep candies. What a great gift to give. Be sure when you give it to put it in a holiday basket filled with paper raffia or lined with a holiday napkin. Also, have patience and take your time when getting those little ghosts to stand upright in their place. They want to fall over. Enjoy!
Nancy
ps. What do you think of my photography skills here? I'm trying some of those fancy close-up shots and I have a frame around my picture. I'm learning! (thanks Anne for your Power Point help) These were suggestions from the book I told you about the other day Blogging For Bliss by Tara Frey.

Halloween Smores In A Jar
Ingredients:
1 quart mason jar
1 sleeve graham crackers
1 package holiday marshmallow peeps
one bag of holiday M&Ms candies
1/3 cup of brown sugar

Directions:
1. Crush 1 sleeve graham crackers to crumbs.
2. Layer 2/3 of the graham cracker crumbs in a 1 qt jar. Pack down the crumbs a bit.
3. Arrange 8 to 12 marshmallow holiday peeps standing up, facing out around the inside of the jar. Press them up against the glass, but don't squash them.
4. Carefully spoon remaining cracker crumbs in the center of the jar to support the peeps, pressing down to keep it snug.
5. On top of this pour 1-1/4 cup M&M's in holiday colors.
7. Spoon 1/3 cup brown sugar into center of M&M's, gently pressing with a spoon. If you have any room left over, fill the jar to the top with M&Ms.

Cooking directions:

1. Empty the jar contents into a bowl.
Snip the peeps into bits with kitchen shears or cut up with a knife.
Return the peep bits to the mixture. Mix well.
2. Melt 1/2 cup butter; add 1 teaspoon vanilla. Pour this over the dry ingredients, mixing well. Pat into a greased 8" or 9" square pan. Bake at 350 degrees F for 15 minutes. Cool and cut into bars.

Wednesday, October 14, 2009

Blogger Blogspot Question - Bloggers Can You Help Me


Most of the time, not always, but most of the time when I view my blog I see a little wrench and screwdriver everywhere I've placed a gadget (like in the little photo above). How do I get that little wrench to go away? Kind of funny how it comes and goes. Do you see it when you look at my blog?

Thank you in advance!

Nancy

Tuesday, October 13, 2009

Tip Technique Tuesday - Designing Your Own Basket

On Sunday, I showed you some casserole carriers that I wove around a Corning Ware dish. I've had e-mails asking how to do this and how I design my own baskets.
From time to time I like to weave a basket to contain something specific like this Corning Ware dish. I've also woven around plastic containers of various sizes. These plastic containers basically become a liner for the basket. This way, I can put food or plants in my baskets and I don't have to worry about my baskets becoming damaged or wet.
The way I start designing the basket is I know what purpose I want to use the basket for.
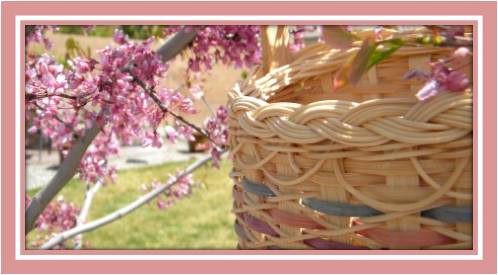
If I want to weave it around something like this dish in the picture, I measure around it. Look closely at the photo. My tape measure extends two inches on each side of the basket. I would cut my stakes for this basket 17". This gives me room to cut and tuck and I won't run short when I get to the top. So basically, measure the three sides (side, bottom, side) and add 4 inches. If it is a large basket, I would add 6" or an extra 3" to each side. Make sense?
Then I almost always use 1/2" flat or 5/8" flat for my stakes or spokes. I weave typically with thinner reed than my spokes so 3/8", 1/4" or 11/64" flat or flat oval or round reed, anything that is thinner or more flexible than my stakes. If I use fillers for my base, I often use 3/8" or 1/2" flat. To know the number of stakes to cut, you're just going to have to do the math on your particular project. It depends on what size stakes you are using and the spacing you choose between each stake.
As I weave up the sides, my creativity just guides me. I just have a finished height in mind. For my rim row, I weave 1/8" narrower reed than what I'm going to use for my rim. for example, if my rim is 1/2" flat/oval, I would weave my top rim row 3/8" flat.
Have you ever been at a store and saw a basket you really liked and thought you could weave it at home with a higher quality look and in colors that matched your decor? Just keep your tape measure in your purse and measure around the basket like I did in the photo. Take a few notes as to what sizes of materials they used and the finished dimensions of the basket. Then you can go home and weave it with better quality products, better reed, better handles etc.
Be sure to post a comment or send me an e-mail if you have further questions about this. I hope it gets you started on designing your own baskets. As always, be sure to let me know when you finish a basket and post me a link to its photo.
Happy Weaving,
Nancy

Monday, October 12, 2009

Blogging For Bliss by Tara Frey

Have you gotten a chance to curl up on the sofa and read for fun?
This is my new favorite book and I've been devouring it. I love reading blogs. I think what I like so much about reading blogs is that they remind me of reading a magazine and I love reading magazines. Magazines have short articles of interest and that is just what blogs are about, short articles of interest. I really enjoy blogging and I've been trying to get better at it. Have you noticed I've been playing around lately with the look of my blog? I've been looking at blogs and trying to decipher what it is about some that just draw me in. That is what I want for my blog. I want to draw you in. I want to be a better writer. I want to be a better photographer. Goodness, some of the photos on blogs make me feel like I am right there. If it is food I just want to reach into my computer and taste it. If it is fabric I just want to touch it.

Blogging For Bliss by Tara Frey is scrumptious. I'm not kidding. She uses examples from over 50 blogs that are amazing in one form or another. She starts out with the very basics covering starting up a blog and takes you step by step through the process. She covers photography, HTML codes, banners and sidebars, search engine optimization and more and more and more! The 50 plus blogs that she mentions are like an interview with each one. Each blog interview talks about blogging and gives some tips and advice. Tara blogs over at http://www.tarafrey.com/ and you can get her book on Amazon.
Have a wonderful day,
Nancy

Sunday, October 11, 2009

Share a Basket Sunday - Woven Casserole Baskets


As the weather cools off I wanted to show you a couple of casserole carriers I wove. Both baskets have handles made from the stakes. The one on the left has a 7/8" strip of reed in the middle of the weaving which I painted. The basket on the right has filler from #6 round reed rather than seagrass. I took the round reed up from where it is sandwiched between the rims and incorporated it into the handle wrapping for a sturdy handle. As I wove these both, I kept putting in the Corning Ware dish into the basket to make sure it would fit. It is a handy way to serve a hot dish at the table.
Have a Blessed Sunday,
Nancy

Saturday, October 10, 2009

Albuquerque Balloon Fiesta Special Shapes Day

Here is where I was Thursday morning with the kiddos. Wish you all could have joined me. It's like a big party at the fiesta park. Like I said, this is my favorite week of the year. (Well, one of them anyway.)
Hugs and Blessings,
Nancy


The regular balloons took off before and after the special shapes.

Friday, October 9, 2009

I Was Featured on FaveCrafts!!!

Dear Friends,
I am so thrilled today as I have been featured on FaveCrafts! They have published one of my basket patterns HERE. Also, they wrote a very nice blog post about me HERE. This is really exciting for me as it is my first publication feature!

Be sure to visit FaveCrafts and get your free basket weaving pattern. While you're there, take look around their site. They have some amazing crafters and tutorials on almost every craft imaginable. I was their first basket weaving tutorial!
I've got to be careful because I'm getting a seriously big head here.
Thanks for letting me brag and share my enthusiasm with all of you and a huge THANK YOU to FaveCrafts.

Happy Weaving,
Nancy

Wednesday, October 7, 2009

Free Basket Weaving Pattern 4 U - My YouTube Berry Basket

Dear Friends,
Here is the written pattern for the berry basket. You can do this basket by following step-by-step through the videos. If you look on the left hand sidebar of my blog, scroll down to my "Learn to Weave" video section. Look for the videos for BERRY BASKET. They start with the one for "Round Basket Base - Berry Basket". Then just go down the video list in order to weave this basket with the videos.

Berry Basket
Pattern Written by Nancy Jacobs

Supplies:
  • 5/8" flat reed
  • 3/8" flat reed
  • 1/4" flat reed
  • 11/64" flat reed
  • 1/2" flat/oval reed
  • 11/64" flat/oval reed
  • #3 round reed
  • Seagrass

Directions

  1. Cut your spokes from 5/8" flat reed. Cut 7 spokes at 18" and 1 spoke at 50"(The 50" piece will form your handle). Mark the centers of your spokes on the rough side.
  2. With rough sides up, lay the 50" piece on the bottom and three of the 18" pieces matching the centers to start the base. It should look like the spokes on a bicycle wheel. Space them apart evenly.
  3. Twine with #3 round reed until the diameter of the base is 5 1/2". Incorporate the four remaining spokes and twine for a couple more rows or until the base is 6".
  4. Upset the spokes.
  5. Using basic over-under weaving for the sides of the basket weave in the following order: Rows 1 and 2 weave 3/8" flat. Rows 3 through 11 weave 11/64" flat (I used dyed reed). Rows 12 through 14 weave 3/8" flat.
  6. ATTENTION, PLEASE READ BEFORE GOING ANY FURTHER. DO NOT CUT YOUR 50" PIECE HERE. It is time to cut and tuck your spokes. You will be cutting the inside spokes and tucking the outside spokes. Even if your handle ended up as an inside spoke, do NOT cut it. Just cut and tuck the other short spokes.
  7. Cut a handle filler from 5/8" flat reed 15" long
  8. Tuck the handles into the basket on the opposite side to your desired length. They will loop over each other to make a double thickness. Sandwich the handle filler between the 50" pieces to again increase the strength of the handle. This now makes a triple thickness for the handle.
  9. Position a rim from 1/2" flat/oval reed on the inside and outside of your top row of weaving. Sandwich a piece of seagrass between the rim pieces. You may taper the ends of the 1/2" flat/oval if desired to decrease the thickness where it overlaps.
  10. Lash the rim in place with 11/64" flat/oval reed.
  11. Wrap the handle with 1/4" flat reed. You may do a decorative treatment with matching dyed reed as desired.
  12. Trim or singe the hairs of the basket.

I hope you enjoy this basket and give it a try, especially if you are new to weaving. If you are a new weaver, this basket is just for you! Follow along with the YouTube videos and it should be a snap. Please let me know when you have woven this or other baskets as I'd love to stop by your blog and see them!
Happy Weaving and Baskets of Blessings,
Nancy

Monday, October 5, 2009

Tip Technique Tuesday - Shaping Your Basket

I've had a couple of e-mails over the past week from new weavers with questions on shaping their basket. I realized I hadn't spoken much about this so I have a few tips to pass along. First let me say that these tips are for standard square/rectangular reed baskets.
  1. Use plenty of clothespins especially in the first few rows. They are your extra hands. One thing I notice when teaching is that students use too few clothespins. The basket above is not large yet I have 10 clothespins on it. As I weave higher up the walls of the basket I won't need as many.
  2. Clothespin your corners upright. You can see easier in the top photo that I have all four corners clothespinned upright. Keep these pinned also for the first few rows, then the clothespins in the corners can be removed.
  3. If you are a new weaver, select patterns that use at least 3/8" or wider weavers for your first few rows. The strength of a 3/8" weaver is strong enough to help get the sides of your basket going up straight quicker. In the photo, I am weaving with 1/4" flat reed. This is a very weak reed so I will need to use more clothespins and continue using quite a few clothespins for additional rows to ensure that my basket walls are going up straight.
  4. One e-mail mentioned that she was weaving with the basket upright like in the top photo and she was struggling. She noticed that I turned my basket on its side like in the bottom photo. If you turn your basket on its side to weave as in the bottom photo, this helps not only the stakes on the top, but also on the bottom take their proper upright shape. One thing you do not see in my videos that I will mention here; On my videos, I weave on the table so that my webcam can see and take the picture. When I weave without a camera, I weave in my lap! I lay my old towel in my lap and weave there. My lap works the same as the table in that I have my basket turned on its side as in the bottom photo. It is much more comfortable to weave in my lap and therefore I get a better finished product.
  5. When starting a row of weaving, get around the first corner and STOP. Take a moment to shape that corner, add clothespins if needed. Now weave across one side of the basket and around the second corner and STOP. Get this side of weaving adjusted as needed and the corner shaped. Continue on with this pattern of stopping after going around each corner so that you can shape each side and corner just the way you want it, not too tight and not too loose so that the sides of your basket will go straight up and down rather than bend inward or flair outward (unless that is the desired shape like in THIS basket which both flairs and bends). Take your time to get it just right with each row.
  6. When lashing on a rim, remember rim material is considerably heaver than your other weaving material. It needs to soak longer so that you can bend it 90 degrees at each corner. What will happen if you don't is the top of your basket will be round or oval. Again, if that is your desired shape then ok, otherwise, be sure to soak it well and bend it well at each corner to keep that square shape.
  7. If the base of your basket is wobbly once it is woven, dampen it slightly and place a heavy book on your basket like a phone book. Let it set overnight to dry and it will be perfectly flat in the morning.
  8. Remember that shaping gets better with practice. The size of the basket in the photo above is a nice size to begin with for a new weaver, it is not too large or not too small. In the words of Goldilocks, "It is just right." For new weavers, be sure to start with some easier baskets to practice your shaping. Most patterns will identify themselves as either beginner, intermediate, or advanced. When you've done a few beginner patterns, spread your wings and try something more challenging. If you follow these tips and take your time, even your very first basket will be a beautiful work of art!

Have a wonderful day of weaving,

Nancy


Continued Prayers Please for a wonderful weaver and her husband

Dear Friends,
A couple of weeks ago I was asking for prayers for my dear friend Barb and her husband Rick. You can read about it HERE. I continue to ask for prayers for them. After 27 days of hospitalization, Rick is now at home but continues to be in pain and is still in need of medical care at home which Barb and home health care providers give. They both continue to have many worries over this and are in need of comfort and encouragement as well as healing.
As I said in my previous post, I met Barb when she took one of my basket classes that I was teaching. I taught her, her very first basket and the beginning techniques of how to weave. Above is a collection of some photos she has sent me and given me permission to post. Just look at her beautiful work now! She wanted me to say that these are not her own designs, but patterns of others that she weaves beautifully. Barb you are an artist!
Please continue to keep Barb and Rick in your prayers and uplifting thoughts.
Love and Blessings,
Nancy


Sunday, October 4, 2009

Share a Basket Sunday - Jack o Lantern Basket

It's October. I've gotten down the autumn decorations from the garage and pulled out a few seasonal baskets like this one I wove years ago. This Jack 0 Lantern is the perfect size to hold candy for the trick-or-treaters. Once Halloween is over I can turn the basket around and put the face towards the wall and it becomes a plain pumpkin basket to take me through Thanksgiving. The weaving is 1/4" flat oval dyed pumpkin (a Rit color no longer available). The eyes and nose is 1/4" flat dyed cocoa and the mouth is #3 round reed. The eyes, nose and mouth are all overlays woven into the basket once its body was completed. Enjoy!
Have a Blessed Sunday.
Nancy

Saturday, October 3, 2009

Baskets of Joy - Free Basket Pattern

Did you remember to stop by Baskets of Joy for their free pattern HERE. What a sweet basket this month. Beginners, this pattern is for you! If you have never tried weaving a basket before this would be a great one to start with. For those of you who don't have supplies, you can get the kit for only $15.95. It also includes the ash strip with the sweet sunflower stenciled on it.
I love this basket!
Blessings,
Nancy

Friday, October 2, 2009

My Favorite Week of the Year Starts Today!


The Albuquerque Balloon Fiesta started this morning with balloons launching off from every elementary school in the area. When balloons go over your head like this one coming over my house, it just takes my breath away. We have so much beauty from God to appreciate, but this is one of my favorite man made beauties on earth. We are fortunate to see a few hot air balloons almost every day of the year, but to see them in such quantity it is incredible bling in the sky.
The first Friday morning of the fiesta is a great start to the week. The elementary school, a couple blocks away from us, sells hot chocolate and breakfast burritos so it is a terrific fundraiser. The children are so excited to see the balloons being inflated and take off from their playgrounds. It is a sight!

I took this photo of the woven hot air balloon basket years ago at either a St. Louis Basket convention or Kansas City Basket convention. I didn't weave it and I'm sorry I don't know who its creator was, but what a perfect basket to show you a picture of today!
Baskets of Blessings,

Nancy


Grab a cup of coffee and take time to enjoy some posts from the past

Affiliate Disclosure Statement

Some of the links/codes on this blog are affiliate links, which means if you chose to make a purchase using my links, I will earn a commission. This commission comes at no additional cost to you. I recommend these products because I have found them to be helpful and useful, not because of the small commissions I make. Every product I recommend, I use myself.