

I was e-mailed and asked how to do a braided rim. I will be doing a video on this, but until then, these photos I have are the next best thing. Also, the weaver I think of first when it comes to braided rims is Genie Jackson. She has a booklet 16 or so pages that covers several types of braided rims. It is called "Braided Border Baskets." Below, I am describing how to do the basic braided rim.
Baskets of Blessings,
Nancy
 1. Weave your basket and then at the top, twine for two rows. Tuck in EVERY stake. Cut your round reed according to the length on the pattern. Mine are 22". Insert the round reed as in the photo under the twining. There is one piece of round reed for every stake and they are looped to the next stake. Make sure all your ends are even at the top. This gives each stake 2 pieces of round reed. These 2 pieces are held together and are now counted together as one spoke.
 2. Start with any spoke and take it behind one spoke to the right and to the outside of the basket. Move to the next spoke to the right and take it behind the next spoke to the right and to the outside. Each spoke to the right does the same in its turn.
 The last spoke standing goes behind and through the one that is already in place.
 3. Again, start anywhere and take any spoke over and through the spoke to the right and to the inside of the basket as show above. Move to the next spoke to the right and do the same. Continue around the basket with each spoke in its turn.
Now, even though the spokes are not standing straight up as they were when we started, you still need to repeat steps 2 and 3 completely again. So, once again, start with any spoke and take it behind the next one to the right and to the outside of the basket and complete steps two and three. After repeating steps 2 and 3 a second time, make sure the spokes lie against the wall of the basket.
Let the spokes dry overnight, then cut the ends at an angle that doesn't show from the top.


4 comments:
Nancy, you are absolutely amazing! This is the first time that I understood how to weave this type of rim. All the pictures I've seen in books were so hard to follow. Thank you so much!
P.S. When are you going to write your own basket weaving book? ;)
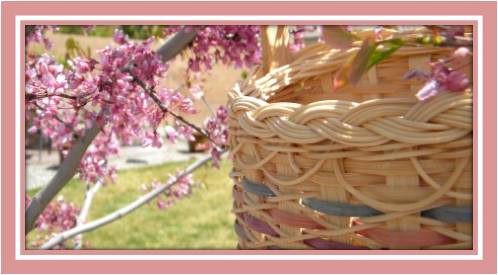
Thank you for the tip on the braided rim. How do I make the wide braided rim that is pictured on the basket at the top of the webpage?
Thank you.
A.Y.
Thank you for the tip on the braided rim. How do I make the wide braided rim that is pictured on the basket at the top of your webpage?
Thank you,
A.Y.
The rim on the basket at the top of my blog is called a Re-woven Border. You can get the directions for that in Genie Jackson's book Braided Border Baskets. :-)
Post a Comment