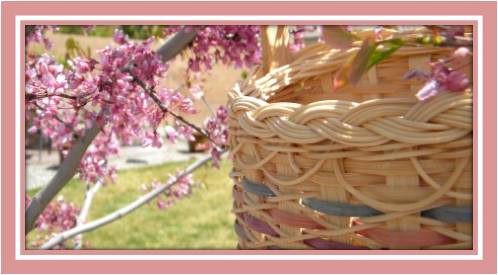
Thanks and Baskets of Blessings to all of you!
Nancy
 Kitchen Counter Basket
Pattern Written by Nancy Jacobs
Finished Size is approx. 11”l x 5”w x 7” h
Materials Required:
5/8” flat reed
3/8” flat reed
3/8” or 1/2” flat/oval reed
11/64” flat or flat/oval
#2 or #3 round reed
Seagrass
Steps:
Cut stakes from 5/8” flat reed 5 pieces 27” long.
Cut stakes from 5/8” flat reed 9 pieces 24” long.
Cut filler stakes from 3/8” flat reed 4 pieces 19” long.
Lay 5 stakes—27” long horizontally, rough side up.
Lay the 4 filler 3/8” stakes between the 27” stakes, smooth side up.
Weave vertically the 9 stakes rough side up from 5/8” flat in an over under weave. The stakes on the far left and right should be woven UNDER the filler stakes. Base is to measure 11” x 5”. Square everything up.
Turn the basket over and fold back the filler stakes and insert ends under weaving.
Turn basket back over and twine one row of #2 or #3 round reed to keep the base in place.
Upset the stakes.
Weave with an over/under weave with 3/8” flat reed for 5 rows or until a height of approx 2”. Colored reed can be woven in here if desired.
Now you will begin increasing the basket on three sides. Begin your weaving on the stake at the farthest left on one of the long sides. Bend the weaver back on its self and hide the end in the weaving. Weave around the front, one end of the basket and the back of the basket ending at the stake on the farthest right. Again bend the weaver back on its self and tuck the end in the weaving.
On the next row begin with the stake, second to the end and do the same ending around on the other side second stake from the right.
Continue increasing the weaving around the basket until your last row is just across one short end of the basket.
Twine for 2 rows around the top of the basket with #2 or #3 round reed.
Tuck in all stakes, hiding the ends under the weavers.
Place a rim of 3/8” or 1/2” flat/oval on the inside and the outside of the two rows of twining.
Place a row of seagrass between the rims and lash rims in place using 11/64 flat or flat/oval.
Trim or singe the hairs of your basket and ENJOY!
I think this basket is great for the kitchen counter. It is long enough to hold business size envelopes, pencils, stamps, mail or just any the things that tend to collect on your counter.


3 comments:
Whoo hoo!! I love this basket Nancy and I've wanted to try a graduated rim. Thanks so much for sharing!!
Nancy~
I love this basket, and the pattern seems quite straight-forward. As a basket-beginner, it would be helpful to me to see the inside (bottom) of the basket to guide me on my weaving efforts.
Thanks for the pattern. I'll see you at Friday's class!
~~~Anne
I really like the look of this basket!!!! The pattern is well written, but I'm still having trouble understanding how to do the graduation on the rim. I hate to ask this, but could you make a video or direct me to a youtube video that shows this? I thought your mini muffin basket was the cutest little thing, too!
Post a Comment