


Dear Friends,
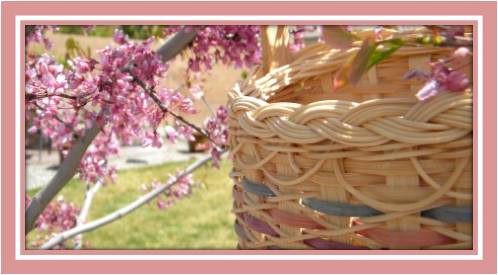
Here is the pattern for this basket in the photo above. This is the basket that I wove throughout my YouTube videos, videos #3 through #12. Please feel free to print off this pattern and weave the basket or print as many copies as you wish and teach this basket to others. If you teach it, would you be so kind to let others know about me and my blog. Many thanks!!! This basket is a beginner level basket designed for the basket weaving newbie.
My YouTube channel http://www.youtube.com/user/basketmasternancy
Recipe Basket
Pattern written by Nancy Jacobs
Supplies:
- 5/8" flat reed
- 3/8" flat reed
- 1/4" flat reed
- 11/64" flat reed
- 3/8" flat/oval reed
- #3 round reed
- Seagrass
Directions:
- Cut your stakes from 5/8" flat reed. Cut 5 stakes at 18" and cut 7 stakes at 15".
- Lay out the 18" stakes horizontally.
- Weave in the 7 remaining 15" stakes vertically doing a basic over-under weave. Base should measure 7" x 5" and everything should be centered up.
- Twine one row with #3 round reed as a keeper row.
- Upset the stakes.
- Using basic over-under weaving for the sides of the basket weave in the following order: Rows 1, 2, and 3 weave 3/8" flat. Rows 4, 5, and 6 weave 11/64" flat (I used dyed reed). Rows 7 and 8 weave 3/8" flat. Row 9 weave 1/4" flat.
- Cut your inside stakes and tuck in your outside stakes.
- Position a rim from 3/8" flat/oval reed on the inside and outside of your top row of weaving. Sandwich a piece of seagrass between the rim pieces.
- Lash rim in place with 11/64" flat reed.
- Trim or singe the hairs and embellish as desired.
I decided my basket would be a recipe basket to hold all the recipes that I tear out of magazines or the newspaper that I want to try. I decorated my little rolling pin with brown and white gingham ribbon and cut out the word "Recipe" using my Cricut cutter with the "Base Camp" cartridge. My rolling pin is wired to the basket.
I hope you enjoy this basket and give it a try, especially if you are new to weaving. If you are a new weaver, this basket is just for you! Follow along with the YouTube videos and it should be a snap. Please let me know when you have woven this or other baskets as I'd love to stop by your blog and see them!
Happy Weaving and Baskets of Blessings,
Nancy

2 comments:
That is super cute!
I won't take up weaving, but your name and post are on my list. I love reading your blog so I will keep on visiting. Blessings
QMM
Post a Comment