May Your Life Be Like A Basket...Useful...Bountiful...Beautiful...

Basketmaster's Weavings is about my passions, much of which revolves around basket weaving. I weave with reed and I love teaching others to weave. Many of the patterns and styles that I show in the blog are geared to the beginning weaver, or even the brand new weaver. If you have been thinking about wanting to learn to weave, then this blog is for you. Throughout the blog and videos I take you step by step through each and every process of weaving. I want you to be successful in weaving the very first time you try. For the intermediate and advanced weaver, my wish is that you take ideas that I show, mix them up a bit, and incorporate them into your own beautiful creations.

Happy Weaving and Baskets of Blessings to all my visitors,

Nancy

You may find my YouTube Videos Here.

Listen to Basketmaster's Making our Home a Haven Podcast.


Thursday, April 30, 2009

May 2009 Newsletter

Friends, this is the basic newsletter (with just a few changes) that I send to students. I put it up on my blog in case they have any trouble reading it in their e-mail. Nancy

Basketmaster’s Weavings
May 2009 Newsletter, Issue 7

Dear Friends,

Can you believe it is May already? I just heard that May is the second busiest month of the year with of course December being the busiest. I believe it. I’ve always found May to be full of end of the school year activities, field trips, ceremonies and so forth.

I’ve been teaching 6th grade religious education at St. Thomas Aquinas and in May, I’m wrapping up my school year with the children. My middle child, Emily and I have been and still are taking cake decorating over at Michaels Crafts. (If you’ve been on my blog, you will have seen some of the cakes we’ve made). Then there are boy scouts and Venture scouting activities that include lots of camping. Top this all off with my children’s birthdays and so needless to say, May is a very busy month. It is for that reason; I’ve decided not to hold any classes in my home during this month. I hope you all understand and I’m wondering if your schedule is as full as mine is.

Have you been to my blog lately? I’ve been putting up videos on it as well as on YouTube that teach the novice how to weave baskets. The videos get posted weekly and take you step by step through the weaving process. They are the same video in both places; it’s just YouTube gives you a bigger viewing screen. So for any of you, who have been hesitant about what it’s like to weave a basket or if you forget and get stuck in the weaving process, just take a look at the videos and if you want, follow me along in them. As I complete the basket, I’ll post full written instructions on my blog.

Here is a link to my YouTube channel: http://www.youtube.com/user/basketmasternancy
e-mail: basketmaster_nancy@yahoo.com

Happy Basket Weaving and
Baskets of Blessings!
Nancy

Wednesday, April 29, 2009

Yet Another Lashing Tool--Make Your Own!


I received a very nice e-mail from Frances at http://weavingwillow.blogspot.com/
She states that some people use spoon handles to create their own lashing tools and that this lashing tool is an idea that has been circulating for some time. I must confess, I've never heard of making a lashing tool from a spoon handle and I think it is just brilliant! I'm all for doing and making it yourself when you can. For other posts on lashing tools, please look HERE
and HERE. Frances sent me this picture of one she made and states, "Last year I dropped by the Goodwill and bought 6 stainless steel spoons at 5 cents each. Cut off the bowls and used a grinder on the cut end of the handle until it looked like a lash saver. Drill a hole in the end and attach a pretty tassel. There you go. I gave them away as gifts to guild members."
So, if any of you are new friends of Frances, you'd better just close your eyes and pretend to be surprised if you receive one of these for Christmas this year!
For those of you who are my personal friends, perhaps you too should close your eyes to this picture because you might just get one in your stocking!
Thanks for sending me such a great idea. I love sharing tips and info like this. As they say over at http://www.wearethatfamily.com/ This idea really works for me!
Happy Weaving Everyone,
Nancy

Tuesday, April 28, 2009

Tip-Technique Tuesday--The Importance of Signing and Documenting Your Artwork


When you weave a basket, you are an artist. You are its creator. Be proud of what you have made and let others know it was you who wove this basket.

Sign your basket.

I sign most of my baskets on the base on a spoke or a stake. If it is has a base made from twining, sign it on either the underside of the handle or on the inside of the rim. Be sure to use an archival pen that will not fade. I use a fine point Sharpie style marker. You may find that if your basket is just very slightly damp that the marker will not bleed into the reed. You may also wish to include the date that you wove it as well as what number of basket it is. Is it your first basket? Second? So forth. Early on I numbered my baskets until I reached 100 and then it just became difficult to remember.

Is your basket a gift for someone? If so, you may want to write a brief message on the bottom as well such as "Happy 16th Birthday Katie, Love Mom". This will help all know the occasion for which this basket was created.

Beyond a long-lasting signature, some artists like to further establish the link between generations of creators and collectors by keeping journals writing why they created a specific piece of work, significant life experiences, relationships involving the work, and living locations. If your baskets are showcased, It’s also a good idea to track the dates and location of exhibitions, and any accompanying press coverage from those events. Keep a list of customers that purchase your baskets—complete with their name, date, location, and where the basket resides—is also a good step toward providing the chronology of a particular piece.

You never know what future life circumstances will bring to you and honestly, you may become quite famous and your baskets may be as sought after as some paintings or sculptures. There are artists today who will even microchip their artwork. (ok, I'm not going to that extreme, but I wanted you to know some people do that)

Sign your basket.
Your great-great grandchildren will treasure it even more knowing it was you who wove it.

Baskets of Blessings,

Nancy

Monday, April 27, 2009

Video #7 is up--Weaving in a Chain Link Color Design

Youtube video #7 is up. Here is the link if you would like to watch it on Youtube for a larger picture rather than here. http://www.youtube.com/watch?v=kB9cqaboFNM

In this video we are weaving color into our basket and doing a sweet chain link design. It continues to be a basic over-under or start-stop weave. I mention dying my reed in the video and the link to that post is HERE for step by step directions. This video runs just under 6 minutes.

Happy Weaving,

Nancy

Sunday, April 26, 2009

Share A Basket Sunday

I wove this basket and it sits in my bedroom by my reading chair and holds my magazines and books. It is called "Plaid Tote" and the author of this pattern is Jean Cadmus May. This was fun to weave with all the colors overlaying on one another. It uses a square notched handle with a 24" notch to notch and a 12" spread. The wide strip in the middle is 1" wide ash.
Enjoy and have a blessed Sunday.
Nancy

Friday, April 24, 2009

Feature a Friend Friday--Anne at "When Pigs Fly"

I've recently been featured on a couple of blogs and I was so touched that people thought of me. Through this, I've decided to add a new feature to my blog. called "Feature a Friend Friday". My plan is to feature a blog friend every other week. It may be basket weavers or it may just be some very special blog friends that I'd like you to meet.

I'm proud to announce my first friend that I'd like to introduce you to is Anne at When Pigs Fly. Anne is special because she really is my 'real life' friend (vs. online) and fellow weaver. I got to teach her, her first few baskets and she is just taking off with her weaving.

Anne is the owner of a Kumon Math and Reading Center which is where I first met her as my children all received Kumon's math services. (I have to add that my oldest went from struggling low C's and D's in math to A's. She went from huge frustrations to math being a joy)

Anne is new to blogging, but oh my check out her blog and pay attention to those recipes. I'm telling you first hand she is a fabulous cook and baker. She's as sweet in person as her desserts are. Anne is very creative and takes all she does to a new level. Also, take a look at those baskets. She just started weaving and her baskets look perfect!

Please pop on over to When Pigs Fly and say "Hello" to Anne and let her know I sent you.

Have a beautiful day everyone.

Blessings,
Nancy

Thursday, April 23, 2009

Basic Basket Weaving Terminology

I wanted to give you some basic basket weaving terminology. You may hear me use words in my videos and see some written on my blog that are unfamiliar, so here is a definition of some of them. These definitions are for basic baskets. There are always basket patterns that break the rules and do something different, but this is for most standard basket patterns. There are many more terms and I will cover some of them in future posts. This will just get you started.
Baskets of Blessings,
Nancy

Base--Bottom of a basket.

Stakes--These are the foundation of a square or rectangular basket. They help form the base and then go up the sides of the basket vertically.

Spokes--These are the foundation of a round or oval basket. They also then go up the sides of the round basket vertically.

Ribs--The skeleton frame in a ribbed basket that weavers are woven on.

Weaver--This is what goes horizontally around the sides of the basket.

Twining--This is done with round reed. It is a half twist in the round reed and is created with either two separate strands, or one strand that has been bent in half.

Packing--Packing is pushing the weavers tightly together as they are woven up the sides of the basket.

Splicing--Splicing is when you run out of a weaver before you are finished so you need an additional piece of weaver to complete the row or basket.

Upsetting the Basket--This is when the base is woven and you bend up the stakes or spokes so that you may begin working on the sides of your basket.

Cut and Tuck or Cutting and Tucking--When finished weaving the sides, you cut the stakes or spokes that are on the inside of the basket flush with your top row of weaving. The stakes or spokes that are on the outside of the basket get folded to the inside and tucked behind a weaver to hide the ends.

Basket Hairs--The splintery looking things on the rough (wrong) side of reed. These are cut or singed off when the basket is completed.

Rim Row--The top row of weaving. This is typically hidden under the rim.

Rim--Typically 2 pieces of reed that are slightly wider than the rim row. These pieces sandwich and cover the rim row and are placed even with the bottom edge of the rim row.

Rim Filler--Something that goes on top of the rim row and is sandwiched between the two rim pieces. Often this is seagrass or round reed.

Lashing--This is the material that holds the rim and rim filler in place.

Shaping--Using your weaver to make the spokes or stakes flare out or pull in.

Tuesday, April 21, 2009

Tip Technique Tuesday--Zip-Ties


You have heard me say that clothespins are our extra hands when weaving a basket. Well, so are zip-ties. You may know them as cable ties. They can be so handy to hold that rim in place while lashing. Unlike clothespins that sometimes snap off of the rim or are in the way, zip-ties hold that rim securely. When you are finished lashing on the rim, simply cut off the zip-tie. On my smaller baskets, I still usually use clothespins, but if I'm weaving a large basket, or one that has a heavy rim such as 1/2" or 5/8" flat/oval, then zip-ties are a great basket weaving tool. Many times you can pick up zip-ties at the dollar store. What do you use to help hold your rim in place while lashing it on?
Happy Weaving and Baskets of Blessings,
Nancy

Monday, April 20, 2009

YouTube Video #6 is up--Weaving the first two rows of your basket


In this video I show how you weave the first two rows of your basket. The reed that goes around your basket is called the "weaver." This is a basic "start-stop" weave or "over-under" weave. Note how I use the clothespins to help hold things in place. If I were weaving a larger basket I would use more clothespins as well.

I'm really enjoying doing these videos. I hope you are enjoying watching them. Oh, and a cool thing... I figured out how to add captions on Youtube so I no longer have to hold my piece of paper up with my blog address. I was even able to caption where I called Youtube, Itunes by mistake. The captions do not show up here on the blogger videos.

Blessings,

Nancy

Sunday, April 19, 2009

Share a Basket Sunday

I know I posted this Sunday, but "As for Me and My House" is hosting a Happy Home Monday and my baskets and sharing cake decorating with Emily is definately making our home happy.
Pop over to their and check them out!
This is a small sweet basket that is holding cinnamon sticks. I had made this for my mother. The stakes are 3/8" flat. The handle is 3/8" flat oval that is just inserted into the weaving, so it could pull out. This is a basket just for decoration. I really like the shape of this basket as I let the body of it flare out a tad. I pulled in on the top of this basket on purpose and then let it again flare out at the rim just a bit. Notice the little basket feet on the bottom. The Minwax stain on this basket is Golden Pecan.


On to other things. My daughter Emily and I have been taking cake decorating classes at Michaels. I must admit, with homeschooling her, it is nice to be able to say, lets take a Friday morning class and I'm not having to take her out of school because she can do her school anytime. She has enjoyed being homeschooled this semester and I plan to homeschool our youngest, Tim starting in the fall. I thought Emily's Tinkerbell cake turned out so sweet just like her decorator. And it was delicious.
I did the hot air balloon cake. Yes, we've been eating a lot of cake lately!

Have a beautiful and blessed Sunday. We are now off to church.

Love,

Nancy

Thursday, April 16, 2009

More about Lashing Tools and Replies to Comments

Hi Friends,

First, I want to thank Debbie about telling me about the EZ Lasher. I've never used this tool but I did check into it. Here is a place it can be purchased. I've not purchased from this company, but I did a quick google search for the EZ Lasher and this is what first popped up. It looks very interesting as look at the picture. It fits right on the end of your lasher. I'm not sure if it would pop off easily when lashing, but it is an interesting concept. If it would stay attached to the lasher then I think it would be just as good as a Lash Buddy.

Second, Tea, I'm laughing because I wouldn't say I'm showing you the 'proper' way to lash a rim, I'm just showing you 'my' way. In fact, I started out with using a small flat blade screwdriver and I ask my students to bring a screwdriver just for the fact of lashing on a rim to 'create the space'. Screwdrivers work mighty fine. What happens though, is I let my students try out my lashing tool and they are hooked and in some instances have one of their own in hand for the next class! hehehe I have a new weaving friend, Darlene and she uses a bone tool and although I've watched others use it, I, myself, have never tried one.

Bone Lashing Tool


Also, while doing further research on lashing tools, I came across one being sold by Royalwood that looks like it would work well. Here is a photo. It is called a Stainless Steel Lashing Fid with hardwood handle and it sells for $9.95. This is something new that I've never seen before.
Finally, I wanted to add, that if you do decide to purchase the Lash Buddy or Lash Saver, in some instances it comes in a small or large size. My personal preference in the small size. When lashing a rim, I lash with 11/64" or 1/4" and both work well with the small size lash buddy. I have found that when using the large size lashing tool, sometimes my spokes are too close together to use it so I continually reach for the small tool. If you are weaving a twill weave basket, you may find that even a lash buddy is too big of a tool to use between your close spokes.

I hope this is giving you all some insight into lashing tools.

Baskets of Blessings and have a wonderful weekend,

Nancy

Lash Buddy--A Favorite Tool of Mine


I use a lot of household common tools and supplies to weave my baskets. Quite honestly, other than buying the reed to start weaving, you would probably have most basket weaving tools on hand in your own home. I do have a couple of specialty basket weaving tools. The first is a Spoke Weight that I mentioned in this post HERE. The second specialty tool I use is a "lashing tool" It is honestly a real favorite tool of mine and I wouldn't weave a basket without it any more. Above are a couple of photos of different ones. When searching your favorite basket weaving store for a lashing tool, it can go by other names such as "Lash Buddy" or "Lash Saver". The cost I've seen runs between $6.50 and $8.00. I find it to be well worth the money.
My friend Anne calls it a shoe horn for basket weaving and that is exactly what it is. When you have your rim fastened in place and you are ready to lash the rim on, slip the lashing tool under your rim and your woven rim row. This creates a channel because the lashing tool is a "U" or "V" shape. This channel allows you to slip your lasher through the channel and lash your rim on with much greater speed. These two pictures show me using it to lash the rim and to hide the end of the lasher.
I rate this tool 2 thumbs up, 5 stars, a 10. Can you see how much I love this tool? What is your favorite tool? I'd like to hear.
Happy Weaving and Baskets of Blessings,
Nancy

Tuesday, April 14, 2009

YouTube Video #5 is up--Upsetting the Sides of Your Basket


Hi Everyone,

I am so happy because I figured out how to post my blog's website on youtube without holding up the piece of paper as in previous videos. I also put a caption in on my youtube video that says to be sure to have your reed "rough side up" so that as you upset the stakes of your basket the rough side will be to the inside of your basket. I still can't figure out how to delete the initial silly expressions on my face as this uploads through Blogger. I laugh because when I start and stop my videos as I make them, my expression looks normal, but Blogger starts my videos a bit later or cuts off just a bit at the end. Oh well. This video runs right at four minutes.

I hope you all enjoy the video.

Baskets of Blessings,

Nancy

A Couple of Special Links and I'd like to Link to You

Paper Napkin basket, companion to THIS basket
Dear Friends,

Over the past month I've been recognized twice on a couple of blogs and let me tell you how nice that is to know that someone is out there noticing me. The blogs that have mentioned me are:


and

Crop Notes and Crafts at post http://cropnotesandcrafts.blogspot.com/

Please take a moment and visit their sites and look around a bit.

I've thought that this was such a sweet thing to do for me, that once or twice a month I'd like to feature basket weavers like yourselves and link to your blogs or websites. If you are a basket weaver and would like me to give you some blog love, send me an e-mail at basketmaster_nancy@yahoo.com and I will check out your blog or website and write some nice words to send traffic your way.

Baskets of Blessings to all of you,

Love,

Nancy

Monday, April 13, 2009

Contemporary Basket Weaving--"Intertwined" at the New mexico Museum of Art


Here is a media release from the New Mexico Museum of Art's Media Center about Intertwined. This is a beautiful collection from Sara and David Lieberman. If you get a chance, go see these awesome baskets that truly are a special art form. All the information is below. I hope these baskets can be an inspiration to you. Being in New Mexico, I plan to make this a special stop on my vacation this summer.
Blessings,
Nancy
PRESS RELEASE from the Museum of New Mexico Media Center
New Mexico Museum of Art
Intertwined: Contemporary Baskets
From the Sara and David Lieberman Collection
Santa Fe, NM ( April 7, 2009),
One of the best contemporary baskets collections in the country was assembled by Sara and David Lieberman. Intertwined shows their passion for collecting contemporary craft and their exceptional openness to new forms and ideas. The more than 150 baskets in their collection were at first collected for their “function and appeal” and their grounding in ancient traditions. But their selections soon included new works of great “vitality and vigor” that were more about “expression and communication” rather than function.
Intertwined: Contemporary Baskets from the Sara and David Lieberman Collection opens at the New Mexico Museum of Art on April 24, 2009 and runs through September 6, 2009. The Women’s Board of the Museum of New Mexico will host an opening reception on the Free Friday Evening, April 24, 2009 from 5:30 p.m. to 7:30p.m.
Intertwined and its accompanying catalog will provide an international look at contemporary basket making and its current level of innovation and experimentation. The baskets in their collection utilize a range of materials and techniques from traditional organic to commercial and often surprising media. Represented artists include the well-known international to the regional—four from Santa Fe—and they work in both functional containers as well as closed, sculptural forms.
Intertwined will include more than 70 traditional and non-traditional baskets, including works by some of the major figures in contemporary basket making: Ed Rossbach, Katherine Westphal, Sally Black, Kiyomi Iwata, Kazuaki Honma, Dorothy Gill Barnes, Carol Eckert John McQueen, Elsie Holiday, Ferne Jacobs, Norma Minkowitz, Fran Reed, Lisa Telford, John Garrett, Kay Kahn, and many more. Both Garrett and Kahn are New Mexico artists.
“This exhibition demonstrates how basketry has been redefined during the past four decades,” says Laura Addison, Curator of Contemporary Art at the New Mexico Museum of Art and local curator for this exhibition. She goes on to say, “Many of the works in Intertwined are unrecognizable as baskets; rather they are sculptures that employ traditional, and nontraditional, basketmaking techniques and materials. The Liebermans’ collection is exceptional in its quality and breadth. Included are works primarily from the United States, including Native American basketry, but also from Japan and Great Britain.”
The contemporary baskets of Intertwined are another sub-category of “crafts” that the Museum has been showing in recent years, including this summer’s exhibition Flux: Reflections on Contemporary Glass and several exhibitions on ceramics over the past decade.
Intertwined is curated by Heather Sealy Lineberry, Senior Curator, ASU Art Museum. Jane Sauer, nationally known basket maker and scholar, consulted on the selection process. The 48-page color catalog includes an essay by nationally-known curator and scholar Kenneth R. Trapp, and a short piece by artist Ferne Jacobs.

Wednesday, April 8, 2009

Wonderful Free Basket Patterns

Have you visited GH Productions website The Basket Maker's Catalog? I counted 18 free patterns on their site. Actually a couple of them are seat weaving and one is a waxed linen ornament, but the remainder are basket patterns. You can get to their free pattern page HERE
They also have supplies and a page full of April sale items HERE

Soteria Green Basket Pattern by Beth Hester .

Peppermint Twist Basket Pattern by GH Productions.


Mini Loaf Basket Pattern by GH Productions.
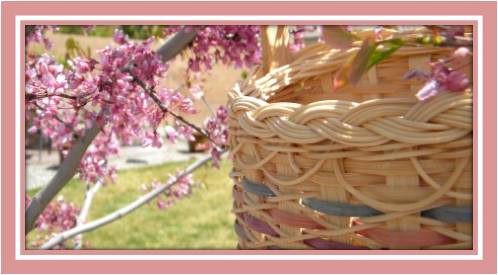

Swing Your Partner by Beth Hester


The above is just a small sampling of the free patterns they have available. On their site they give permission to print them out and share them with your friends.

Baskets of Blessings,

Nancy


Tuesday, April 7, 2009

YouTube Video #4 is up--Twining a Keeper Row

Seems like every time I put a video up, it shows the dorkiest (is that a word?) expression on my face even though I start off with a smile. Oh well.

Here is video #4 and it shows twining a keeper row around a rectangular base. I'll show twining a round basket base another time.

One thing I failed to mention on the video is that my reed has been soaked for about 5 minutes. Both my basket base and my round reed have been soaked. I hope you all know to do that so on the video it goes without saying. This video runs about 7 minutes.

Have a wonderful day and baskets of blessing,

Love,

Nancy

Sunday, April 5, 2009

Share a Basket Sunday--Seagrass

Seagrass can be added to a basket to create a nice texture and interest to a basket. It can be woven into the basket directly. I use seagrass as a filler between my two rim pieces to hide my cutting and tucking and it gives the basket a nice finished look.
This is braided seagrass and is about 3/4" wide. It also adds an interesting look to a basket by weaving it into the sides.

You can see braided seagrass woven into my paper plate basket. I've also used it as a rim filler.

I do not soak my seagrass because first, it is pliable so there is no need because it bends and twists with ease. Second, seagrass will unravel if it becomes soaked. That said, you can dye seagrass. I have my recipe for dying reed here. When dying seagrass, I use half the amount of water so the dye is more concentrated. It takes seagrass a bit longer than reed to absorb the dye and to get a nice rich color. To keep the ends of the seagrass from unraveling during its dye bath, be sure to tie each end in a tight knot and I also put a clothespin on each end as well.
Seagrass comes in different sizes. My personal preference is the 3/16" size. You can buy it in 1 lb or 3 lb amounts. Even with me teaching classes, a 1 lb amount lasts a long time.
When weaving with seagrass or braided seagrass, I just but the ends together on the back side. I don't tuck the ends in or try to hide them because of their bulk.
Give weaving with seagrass a try and be sure to let me know about your weaving. Send me a link to your project!
Blessings,
Nancy

Grab a cup of coffee and take time to enjoy some posts from the past

Affiliate Disclosure Statement

Some of the links/codes on this blog are affiliate links, which means if you chose to make a purchase using my links, I will earn a commission. This commission comes at no additional cost to you. I recommend these products because I have found them to be helpful and useful, not because of the small commissions I make. Every product I recommend, I use myself.