May Your Life Be Like A Basket...Useful...Bountiful...Beautiful...

Basketmaster's Weavings is about my passions, much of which revolves around basket weaving. I weave with reed and I love teaching others to weave. Many of the patterns and styles that I show in the blog are geared to the beginning weaver, or even the brand new weaver. If you have been thinking about wanting to learn to weave, then this blog is for you. Throughout the blog and videos I take you step by step through each and every process of weaving. I want you to be successful in weaving the very first time you try. For the intermediate and advanced weaver, my wish is that you take ideas that I show, mix them up a bit, and incorporate them into your own beautiful creations.

Happy Weaving and Baskets of Blessings to all my visitors,

Nancy

You may find my YouTube Videos Here.

Listen to Basketmaster's Making our Home a Haven Podcast.


Showing posts with label Basics of Basket Weaving. Show all posts

Thursday, August 19, 2010

Creating Custom Colors for Dying Reed

As many of you know, I use Rit Dye to dye my reed. Have you been to Rit's website to see all the beautiful colors that are available? Did you know that you can create your own custom colors with their custom color recipes? Be sure to check out the site when you are getting ready to dye your reed so you can get just the perfect color. Rit gives very specific recipes for many custom colors. You can just follow their color recipe along with my directions for dying reed that I gave HERE on this previous post.

When you are looking for places to purchase Rit dye, you can find it in stores such as Walmart and Target in the laundry section. Also many grocery stores sell rit dye with their laundry detergent. Keep your eyes open for it at fabric stores like JoAnns and Hancock Fabrics. Finally, sometimes you can get a great deal on it at places like Tuesday Mornings or Big Lots. It's out there and it's available if you just know where to find it. Also, if you are lucky enough to get some at a garage sale, grab it. I've personally not found it to expire and the colors still come out beautiful. I do buy mine in the powder form on most occasions just because it is less expensive than the liquid.

So try a custom color sometime. When you do, be sure to send me an e-mail and post a picture of it. I'd love to see how your custom colors turn out.

Baskets of Blessings,

Nancy

Wednesday, August 11, 2010

Basket Weaving - Facts about Twining

Twining--A basketry technique using two or more sets of elements in which one set encircles the other.

Did you know that the first use of 'twining' was probably to hold twigs and sticks together to construct shelter walls?

Twining has also been used in ancient times by people as they spaced out twined rows to make traps and fish nets. They spaced their twined rows closer together to make lightweight baskets.

Stiff twining materials include: reed, rattan, cane, ropes, stiff grasses and stems of plants.

Flexible materials for twining include: cords, twine, jute and yarn among others.
I use twining on most every basket. On round or oval baskets I use twining to form the base. On square or rectangular baskets I use twining to stabilize the base and this keeps the base's shape. On some baskets, I will use twining on the sides for an interesting visual element.
You can begin by crimping one piece of material on itself and twining with just that one piece. You may also twine with two pieces of similar elements. An interesting technique is to use two pieces of the same size reed but have they dyed different colors and twining with the two colors. This is very pretty.
Enjoy twining and Happy Basket Weaving,
Nancy

Thursday, July 22, 2010

Back To Basics in Basket Weaving - Shaping Your Basket

I've had a couple of e-mails over the past week from new weavers with questions on shaping their basket. I realized I hadn't spoken much about this so I have a few tips to pass along. First let me say that these tips are for standard square/rectangular reed baskets.
  1. Use plenty of clothespins especially in the first few rows. They are your extra hands. One thing I notice when teaching is that students use too few clothespins. The basket above is not large yet I have 10 clothespins on it. As I weave higher up the walls of the basket I won't need as many.
  2. Clothespin your corners upright. You can see easier in the top photo that I have all four corners clothespinned upright. Keep these pinned also for the first few rows, then the clothespins in the corners can be removed.
  3. If you are a new weaver, select patterns that use at least 3/8" or wider weavers for your first few rows. The strength of a 3/8" weaver is strong enough to help get the sides of your basket going up straight quicker. In the photo, I am weaving with 1/4" flat reed. This is a very weak reed so I will need to use more clothespins and continue using quite a few clothespins for additional rows to ensure that my basket walls are going up straight.
  4. One e-mail mentioned that she was weaving with the basket upright like in the top photo and she was struggling. She noticed that I turned my basket on its side like in the bottom photo. If you turn your basket on its side to weave as in the bottom photo, this helps not only the stakes on the top, but also on the bottom take their proper upright shape. One thing you do not see in my videos that I will mention here; On my videos, I weave on the table so that my webcam can see and take the picture. When I weave without a camera, I weave in my lap! I lay my old towel in my lap and weave there. My lap works the same as the table in that I have my basket turned on its side as in the bottom photo. It is much more comfortable to weave in my lap and therefore I get a better finished product.
  5. When starting a row of weaving, get around the first corner and STOP. Take a moment to shape that corner, add clothespins if needed. Now weave across one side of the basket and around the second corner and STOP. Get this side of weaving adjusted as needed and the corner shaped. Continue on with this pattern of stopping after going around each corner so that you can shape each side and corner just the way you want it, not too tight and not too loose so that the sides of your basket will go straight up and down rather than bend inward or flair outward (unless that is the desired shape like in THIS basket which both flairs and bends). Take your time to get it just right with each row.
  6. When lashing on a rim, remember rim material is considerably heaver than your other weaving material. It needs to soak longer so that you can bend it 90 degrees at each corner. What will happen if you don't is the top of your basket will be round or oval. Again, if that is your desired shape then ok, otherwise, be sure to soak it well and bend it well at each corner to keep that square shape.
  7. If the base of your basket is wobbly once it is woven, dampen it slightly and place a heavy book on your basket like a phone book. Let it set overnight to dry and it will be perfectly flat in the morning.
  8. Remember that shaping gets better with practice. The size of the basket in the photo above is a nice size to begin with for a new weaver, it is not too large or not too small. In the words of Goldilocks, "It is just right." For new weavers, be sure to start with some easier baskets to practice your shaping. Most patterns will identify themselves as either beginner, intermediate, or advanced. When you've done a few beginner patterns, spread your wings and try something more challenging. If you follow these tips and take your time, even your very first basket will be a beautiful work of art!
Have a wonderful day of weaving,
Nancy

Thursday, July 15, 2010

Back To Basics in Basket Weaving - Designing your Own Basket

On Sunday, I showed you some casserole carriers that I wove around a Corning Ware dish. I've had e-mails asking how to do this and how I design my own baskets.
From time to time I like to weave a basket to contain something specific like this Corning Ware dish. I've also woven around plastic containers of various sizes. These plastic containers basically become a liner for the basket. This way, I can put food or plants in my baskets and I don't have to worry about my baskets becoming damaged or wet.
The way I start designing the basket is I know what purpose I want to use the basket for.
If I want to weave it around something like this dish in the picture, I measure around it. Look closely at the photo. My tape measure extends two inches on each side of the basket. I would cut my stakes for this basket 17". This gives me room to cut and tuck and I won't run short when I get to the top. So basically, measure the three sides (side, bottom, side) and add 4 inches. If it is a large basket, I would add 6" or an extra 3" to each side. Make sense?
Then I almost always use 1/2" flat or 5/8" flat for my stakes or spokes. I weave typically with thinner reed than my spokes so 3/8", 1/4" or 11/64" flat or flat oval or round reed, anything that is thinner or more flexible than my stakes. If I use fillers for my base, I often use 3/8" or 1/2" flat. To know the number of stakes to cut, you're just going to have to do the math on your particular project. It depends on what size stakes you are using and the spacing you choose between each stake.
As I weave up the sides, my creativity just guides me. I just have a finished height in mind. For my rim row, I weave 1/8" narrower reed than what I'm going to use for my rim. for example, if my rim is 1/2" flat/oval, I would weave my top rim row 3/8" flat.
Have you ever been at a store and saw a basket you really liked and thought you could weave it at home with a higher quality look and in colors that matched your decor? Just keep your tape measure in your purse and measure around the basket like I did in the photo. Take a few notes as to what sizes of materials they used and the finished dimensions of the basket. Then you can go home and weave it with better quality products, better reed, better handles etc.
Be sure to post a comment or send me an e-mail if you have further questions about this. I hope it gets you started on designing your own baskets. As always, be sure to let me know when you finish a basket and post me a link to its photo.
Happy Weaving,
Nancy

Thursday, July 8, 2010

Back to Basics in Basket Weaving - Starting and Stopping a Project

I try really hard to complete weaving a basket in just one sitting. Sometimes though, that just isn't possible. I want to give you a few tips on where to stop if you are working on a large project and need to pause so you can cook dinner for the family.


If it is a large project, one stage you can do is read through your pattern, gather your supplies and cut your stakes. Of course you can stop at this point. I like to have all my supplies gathered together because it is frustrating to have to get up and down because I've forgotten something.

Is your basket being woven in all natural reed? If so, and if there are no wooden parts then you can stop at most any time during your project and just resoak it when you are ready to begin again.

If you have wooden parts on your basket such as a wooden base or a wooden handle, you shouldn't even dip those in water. Some wooden handles are held together with glue and the water could affect the stick-um power of the glue. Some handles are steamed into their shape and water could cause them to relax and straighten back out. Of course they may get slightly damp from using wet reed and that cannot be helped, I'm just saying don't dip them in water. So that said, when you start weaving, it is best to weave up to the top of your basket and get your stakes cut and tucked. You can always put the rim on during your next basket weaving session.

If you have used some dyed reed in your project, you should either stop before incorporating the dyed reed on your project, or again weave to the top and do your cutting and tucking. If you need to re-soak your reed later you strongly risk your dyed reed bleeding onto natural reed. Spend a minute really shaping your basket at this point so that when you come back to lash the rim on, your basket will be shaped properly.

If you are doing a braided rim and the basket is in natural, I like to get my round reed in place before pausing.

What happens when.....your child requires that horrible trip to the emergency room when you just have to drop everything? Well, things like this can happen and you have no control of when to stop working at a convenient place. (Seriously though, let's hope that never happens!) What I would do is when I return; I'd mist the reed lightly with a water bottle and work on shaping the basket the best I could. I'd continue weaving up the sides and again mist the reed where it gets cut and tucked. Have a paper towel handy to wipe off excessive drips. By only misting and using a towel to wipe drips you will decrease your chances of the dyed reed bleeding onto the natural reed. When you tuck in your stakes, you may have more cracking and splintering than usual, but...this is just one of those times where that cannot be helped. The cracking and splintering will be hidden by the rim and rim filler.

I hope this gives you some suggestions when to pause your weaving should you need to . Of course, in all instances, it is ideal to go from beginning to the finished project in one session.
Happy Weaving,
Nancy

Thursday, July 1, 2010

Back To Basics in Basket Weaving - Basket Weaving Terminology

I wanted to give you some basic basket weaving terminology. You may hear me use words in my videos and see some written on my blog that are unfamiliar, so here is a definition of some of them. These definitions are for basic baskets. There are always basket patterns that break the rules and do something different, but this is for most standard basket patterns. There are many more terms and I will cover some of them in future posts. This will just get you started.


Baskets of Blessings,

Nancy
-----------------------------------------------------------------------------
Base--Bottom of a basket.

Stakes--These are the foundation of a square or rectangular basket. They help form the base and then go up the sides of the basket vertically.

Spokes--These are the foundation of a round or oval basket. They also then go up the sides of the round basket vertically.

Ribs--The skeleton frame in a ribbed basket that weavers are woven on.

Weaver--This is what goes horizontally around the sides of the basket.

Twining--This is done with round reed. It is a half twist in the round reed and is created with either two separate strands, or one strand that has been bent in half.

Packing--Packing is pushing the weavers tightly together as they are woven up the sides of the basket.

Splicing--Splicing is when you run out of a weaver before you are finished so you need an additional piece of weaver to complete the row or basket.

Upsetting the Basket--This is when the base is woven and you bend up the stakes or spokes so that you may begin working on the sides of your basket.

Cut and Tuck or Cutting and Tucking--When finished weaving the sides, you cut the stakes or spokes that are on the inside of the basket flush with your top row of weaving. The stakes or spokes that are on the outside of the basket get folded to the inside and tucked behind a weaver to hide the ends.

Basket Hairs--The splintery looking things on the rough (wrong) side of reed. These are cut or singed off when the basket is completed.

Rim Row--The top row of weaving. This is typically hidden under the rim.

Rim--Typically 2 pieces of reed that are slightly wider than the rim row. These pieces sandwich and cover the rim row and are placed even with the bottom edge of the rim row.
Rim Filler--Something that goes on top of the rim row and is sandwiched between the two rim pieces. Often this is seagrass or round reed.

Lashing--This is the material that holds the rim and rim filler in place.

Shaping--Using your weaver to make the spokes or stakes flare out or pull in.

Wednesday, June 23, 2010

Back to Basics in Basket Weaving - How To Dye Reed


Today I would like to post my directions on how I dye my reed. There are several dyes on the market, but I use good old Rit dye and this is my recipe.

I use a large enamel pot and work outside on an outdoor propane burner. I fill the pot about 1/2 full of water which in my case is about 2 1/2 gallons of water. I get the water up to a boil and add one box of powdered Rit die, 1 cup table salt and 1 cup white vinegar. I use powdered Rit only because it cost less than the liquid, but liquid is fine. I use the salt and vinegar to help get the color to really set well. Yes, it will fade if placed in direct sunlight, most dyes will but the salt and vinegar just seem to help keep it from having any natural fading. Using my recipe gives me really rich colors. Once the water is boiling, I turn off the heat and add my reed. I will add 2 1/2 pounds of reed to this mixture. Any more than that, it just doesn't get the intensity of color that I like. Usually I will dye 1 pound of 3/8" flat and 1 pound of 1/4" flat. Then I use 1/2 pound of another size of my choice. This just seems to be what works for me. I open up my pounds of reed and submerge them into the pot of dye doing one pound at a time. I have a big set of barbecue tongs to help push the reed down into the water. Sometimes it wants to float and most times I have to turn it to be sure it gets complete coverage. I have plenty of newspaper on the ground to catch drips and to also lay the reed on to dry once it has achieved it's color. Getting the color usually only takes a few minutes, but I have been known to let the reed soak for up to an hour. Dying reed is a simple process and very fun to watch the colors appear. I don't wear gloves, but I do wear old clothes. Please don't dye it in your kitchen. Accidents can happen too easy and oh what a mess! Also, be sure to visit http://www.ritdye.com/ for color charts, techniques and ideas.
Have Fun!
Nancy

Thursday, June 17, 2010

Back To Basics in Basket Weaving - Spoke Weight


I have a couple of favorite basket weaving tools, but today I'm going to talk about my #1 tool, the Spoke Weight.

When I first learned how to weave we would put our dishpans full of water on the table to hold our reed in place. While this worked, it was very space consuming. The spoke weight is a heavy metal weight that also is a ruler. It is perfect for holding reed in place and measuring to get the exact length of reed or space between reeds. This is a must have tool for basket weavers.

Here is my tip. What if you don't have a spoke weight and don't want to put the dishpan on the table? What if you do have a spoke weight yet your basket is large and you need more than one. Here's what you do. Go to your pantry and get out a bag of dried beans and use that as a weight. Dried beans are inexpensive, the plastic bag keeps the beans dry, and they don't take up hardly any additional table space. Use 2, 3, or 4 bags if needed. It is a handy homemade kitchen tool to make your basket weaving just that much easier!
Happy Weaving,
Nancy

Thursday, June 10, 2010

Back to Basics in Basket Weaving - Making Reed Curls


I've had people ask, "How did you make those curls?" "Are those curlie Q's made from reed?"


Yes, those curls are made from reed. I used 11/64" flat reed and rolled it around a 1/4" dowel rod. Soak the read well first, 15 minutes at least. Then secure the end of the reed to the dowel with a clothespin and just keep wrapping. Secure the other end with a clothespin as well. Let the reed dry completely before removing it from the dowel. You can then pull on the coils slightly to give them a springy look. You can do the same thing using round reed as well for a pretty look. Once the reed is removed from the dowel rod, cut it into desired lengths and wire to your basket. Try using several colors or a color with natural for a pretty basket embellishment.
Happy Basket Weaving,

Nancy

Tuesday, June 1, 2010

Back to Basics in Basket Weaving -- Creating A Professional Finish

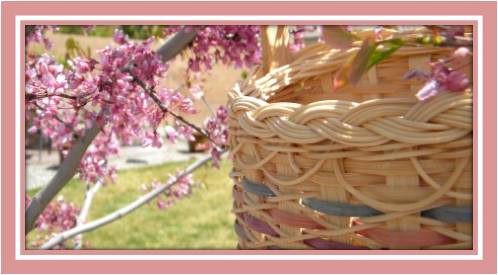
Before cutting and tucking your spokes, fold down the spokes that are to go to the inside of the basket. Measure those spokes so that when you cut them, the end will be hidden behind one of your weavers. The goal is not to have any rough ends showing to give you a professional look. This way, when someone is looking at your basket, they do not know where pieces of reed have started and where they have ended.When tucking your spokes in, try to go under the very top weaver. Again, this gives a more professional look to your basket. Take a look at the finished product. You don't see the spoke hidden behind the weaver. I always say, this is a big difference between our beautiful handwoven baskets and those that we purchase at the store.
Happy Weaving,

Nancy

Tuesday, May 25, 2010

Back to Basics of Basket Weaving - Getting the Perfect Bend in Round Reed

There are times when round reed needs to be bent and it can be very frustrating to have a piece of round reed snap in half. A simple solution to keep this from happening is to have in your tool kit a needle nose pliers. When needing a crisp bend in the round reed, pinch it with the pliers first and then bend the reed. This virtually eliminates the risk of the reed breaking. Of course it goes without saying, make sure your reed is well soaked.


Baskets of Blessings,

Nancy

Tuesday, May 18, 2010

Back to Basics of Basket Weaving - Basket Making Terminology

Good Morning Friends,
How are you all doing today?  It is cloudy yet comfortable here and I've got the windows open which I love.  It is a great day for weaving.
Today I wanted to give you some basic basket weaving terminology. You may hear me use words in my videos and see some written on my blog that are unfamiliar, so here is a definition of some of them. These definitions are for basic baskets. There are always basket patterns that break the rules and do something different, but this is for most standard basket patterns. There are many more terms and I will cover some of them in future posts. This will just get you started.
Baskets of Blessings,
Nancy

Base--Bottom of a basket.

Stakes--These are the foundation of a square or rectangular basket. They help form the base and then go up the sides of the basket vertically.

Spokes--These are the foundation of a round or oval basket. They also then go up the sides of the round basket vertically.

Ribs--The skeleton frame in a ribbed basket that weavers are woven on.

Weaver--This is what goes horizontally around the sides of the basket.

Twining--This is done with round reed. It is a half twist in the round reed and is created with either two separate strands, or one strand that has been bent in half.

Packing--Packing is pushing the weavers tightly together as they are woven up the sides of the basket.

Splicing--Splicing is when you run out of a weaver before you are finished so you need an additional piece of weaver to complete the row or basket.

Upsetting the Basket--This is when the base is woven and you bend up the stakes or spokes so that you may begin working on the sides of your basket.

Cut and Tuck or Cutting and Tucking--When finished weaving the sides, you cut the stakes or spokes that are on the inside of the basket flush with your top row of weaving. The stakes or spokes that are on the outside of the basket get folded to the inside and tucked behind a weaver to hide the ends.

Basket Hairs--The splintery looking things on the rough (wrong) side of reed. These are cut or singed off when the basket is completed.

Rim Row--The top row of weaving. This is typically hidden under the rim.

Rim--Typically 2 pieces of reed that are slightly wider than the rim row. These pieces sandwich and cover the rim row and are placed even with the bottom edge of the rim row.

Rim Filler--Something that goes on top of the rim row and is sandwiched between the two rim pieces. Often this is seagrass or round reed.

Lashing--This is the material that holds the rim and rim filler in place.

Shaping--Using your weaver to make the spokes or stakes flare out or pull in.

Saturday, May 15, 2010

Back To Basics of Basket Weaving - Tools Used in Making a Basket

Good Morning Friends,
Lately I've been receiving a number of e-mails with questions related to beginning basket weaving.  I'm thinking its time to get back to the basics because I want to encourage all you new weavers that basketry is something you CAN do.  Some of my posts in this series will be new, some you may have seen before.  Hopefully you will be reminded and refreshed with new ideas once again.

Today I want to share with you the tools I use in weaving baskets.  For those of you just starting out, I'm going to begin by listing just the basics you need.  The wonderful thing about basket weaving is that you can start weaving with tools you most likely already have at home.  There is minimal investment.
  • Something to hold water.  At home I use my kitchen sink.  When I weave elsewhere I take a dishpan.
  • Tape Measure
  • Old Bath Towel
  • Dozen clothespins
  • Old Heavy Duty Kitchen Scissors
  • Small Flat Blade Screwdriver
That's it!  For those of you wanting to give weaving a try, did you realize that basket weaving only needed these few tools?

Now, I've been weaving a long time so I have added a few tools to my collection to make weaving a bit easier, but all the extras are not necessary.

I carry all my supplies around in an old dishpan that I use for water when weaving. Everything fits nicely in it.


Now I wanted to show you what I keep in my work basket. I wove my work basket and attached the blue leather handles with rivets. The handles are just the right size to hold my spoke weight and the leather keeps the spoke weight from slipping out of the handles. Here are its contents:
  • My old towel that sits in my lap when I weave
  • Spoke weight
  • Packing tool
  • Awl
  • Tape measure
  • Glue - to attach embellishments
  • 2 Lashing tools
  • Mini electrical clamps (those are in the zip lock baggie)
  • Pencil
  • Nail clippers- to trim the hairs off the basket
  • Reed gauge - to measure the size of reed (I eyeball my size most of the time)
  • Exacto knife
  • Lighter (I don't smoke, but I do use this to singe the hairs on my baskets)
  • Wire - also to attach embellishments
  • Sharpie - to sign my baskets
  • Twist ties - to bundle spokes for kits together
  • Clothespins
  • Large electrical clamps
  • Needle nose pliers
  • Zip ties
  • Samples of hair conditioner - keeps reed and my hands soft
  • Band aids (you never know)
  • Old kitchen scissors (not shown, children must have taken it)
  • Squirt bottle with water (also not shown, again I'll blame it on the kids)
Of course I have more in quantity of some of the items show, this just is a sampling. What is in your work basket?
Blessings,
Nancy

Grab a cup of coffee and take time to enjoy some posts from the past

Affiliate Disclosure Statement

Some of the links/codes on this blog are affiliate links, which means if you chose to make a purchase using my links, I will earn a commission. This commission comes at no additional cost to you. I recommend these products because I have found them to be helpful and useful, not because of the small commissions I make. Every product I recommend, I use myself.